Chestnuts are another food that has deep childhood associations. My family lived on a dairy farm in Berkshire County, Massachusetts, but we were odd dairy farmers. My father had grown up in Europe, going to a series of Swiss boarding schools, before his mother brought him back to the US where he went to high school at Pomphret, a boarding school dedicated to the education of the sons of the lesser known Boston elite. Then he went to Harvard, and contrived to get thrown out in his senior year for not doing any work in a history seminar. You have to admit, it's a strange background for a dairy farmer.
My mother went to one of the upper class New York day schools, and then to boarding school at Foxcroft, in Middleburg, Va. , where, along with getting a pretty decent education (my mother never failed to blow me away by the depth of her knowledge) she fox hunted on a horse named Nonchelant which belonged to her aunt. Again, a pretty weird background for the wife of a dairy farmer.
World War II had something to do with my father's lifestyle choice, and my mother came along for the ride. So it was that on vacations, we would end up staying with our New York cousins, not exactly country mice, but nonetheless, dazzled by the big city. I have a vivid memory of being somewhere on the West Side, maybe near Lincoln Center, where we used to go to see the Nutcracker, and buying chestnuts from a vendor for the first time. The vendor had a charcoal brazier on a cart. with chestnuts spread across a piece of sheet metal. If people were buying, the chestnuts had time to cook but not burn. They were handed over in a small paper bag which kept our hands warm while we ate the chestnuts. The nuts themselves were creamy, warm and comforting, something like a miniature baked potato.
When I got back to New York as a graduate student, I barely had time to hang out in any of the places that would attract chestnut vendors. When I did run across them, their chestnuts were disappointingly charred. It was like eating a baked potato that had frizzled in a campfire.
But I have always had a soft spot for chestnuts. One November, my husband and I went to Paris, and frequented a bunch of little neighborhood bistros. In one, I ordered a soup whose name I did not recognize, but didn't have the nerve to ask the waiter about. When the soup came, I did ask. It turned out to be chestnut soup. It was delicious.
At Christmas, I looked for some sort of cream soup to start Christmas dinner. All the soup recipes in the NYTH cookbook had either been served or contained the dreaded shellfish. On the Food Republic website, I ran across this recipe and thought "yes" "aha." It was French, it was chestnuts, and hey, the recipe said only 20 minutes prep time. So I bought some chestnuts, which were surprisingly available in DC, ( I think I bought my chestnuts at Whole Foods, but it might have been Magruders.)
Actually I bought quite a few chestnuts. The recipe said 2 1/2 pounds to make soup for four people. We were expecting eight people, so I bought five pounds. On the night of the 23rd, I sat down to start peeling the chestnuts. It was an excruciating task. I had to pierce the annoyingly tough and slippery skin, and then pry the meat out. It wasn't easy and resulted in many nicks and cuts to my hands. After an hour and a half, I had peeled maybe half the chestnuts. As I slumped over my measly collection of peeled chestnuts, Laura blew in. She is a friend of my daughter's now living in our basement, and sort of ministers to us old people , as well as working 55 to 60 hours a week. Laura made me a fresh cup of tea, and looked at what I was doing. "Boil them first," she advised, as she disappeared out the door with the puppy.
So the next day, I threw the rest of the chestnuts into a stewpot and boiled them for an hour. This resulted in rendering the tough, slippery skin somewhat more flexible, so it was actually possible to peel the shell off the nuts, instead of having to pry them off. It did not mean the operation went a lot faster, however. After another hour and a half, I had peeled the last of the chestnuts into the big china bowl and was ready to totter off to bed.
It was clear to me that Alain Ducasse, although he was a world famous chef, or because he was a world famous chef, had not factored peeling the chestnuts into the prep time. He was too busy creating a world image and opening restaurants around the globe, after all.
As far as the cooking went, our friend Tim stepped in and did most of that. I do know that everything had to cook for far longer than 45 minutes. One little throw away line startled me. I could see from the photo, the soup had been run through a blender. However, blenders were not mentioned. It did say, at the beginning to step 7, "Blend the soup thoroughly." It didn't mean mix it up. It meant, run it through the Cuisineart.
According to my husband, the soup was not all that great. Our guests had a wonderful time however. Nothing damped the Christmas spirit.
My advice is to use frozen chestnuts if you can get them, and to be prepared to doctor the soup with herbs and spices.
Chestnut Soup
2 shallots
3 stalks celery
3 cloves garlic
2 slices bacon
1 bay leaf
1 teaspoon peppercorns
2 quarts chicken stock
12 ounces porcini mushrooms
1 tablespoon salt
1 tablespoon black pepper, ground
2 1/2 pounds chestnuts, peeled
1 tablespoon olive oil
1. Preheat the oven to 250 degrees.
2. Peel and cut the shallots and celery into large chunks. Peel the three garlic cloves.
3. Heat a flameproof casserole dish and put in two slices of bacon, 1/8 inch thick. Color well (this means brown deeply) on both sides and then take the slices out and keep them warm.
4. Add the chunks of shallot and celery and the whole garlic cloves to the bacon fast. Stir for 1 to 2 minutes. Add 2 1/2 pounds of peeled chestnuts to the casserole dish. Sweat for three minutes, stirring. (this means saute for three minutes.)
5. Take out about 20 chestnuts and set aside. Then add a bay leaf and the peppercorns. Add the chicken stock and put the casserole dish in the oven for 45 minutes. (I would turn the heat up to at least 300 degrees, 350 if you have to, or allot 90 minutes for the chestnuts to cook.)
6. In the meantime, clean the mushrooms. Slice the caps of 2 firm mushrooms into thin slices and keep cold on a plate covered with plastic wrap. Chop the rest into small dice.
7. Once the chestnuts are soft, run the contents of the casserole dish through a blender or Cuisineart. Taste and adjust the seasoning, adding salt and freshly ground black pepper. Keep hot. Cut the two slices of bacon into fine lardons and cut the 20 reserved chestnuts into quarters.
8. Heat one tablespoon of olive oil in a saute pan and brown the chestnuts for two minutes. Add the diced mushrooms, salt lightly and cook for an additional two minutes.
9. Add the small lardons, stir and adjust the seasoning. Sprinkle with mushroom slices and serve nice and hot.
Thursday, December 26, 2013
Hard Sauce
When I was a child, we occasionally had plum pudding for Christmas dinner. I think the reason was that my sister liked the idea of plum pudding, with its associations with Dickens and steaming huge puddings being carried into the hall to the joy of the tenantry. Well, in those days, I was the tenantry. It took a long time for me to appreciate how liquor in one form or another could flavor food and add richness to its taste. This did not happen until well after I left home, so as an eight year old, twelve year old or even an eighteen year old, plum pudding fell into the category of "why is this such a big deal?"
But hard sauce, now that was something different. Anyone, especially a person with as big a sweet tooth as I had, could appreciate a sauce that was basically butter mixed with sugar. The base was so good that even a little bit of rum didn't ruin it for me.
So when it came time for me to be served, I asked for a tiny bit of pudding, and then glopped about half a cup of hard sauce on top of it.
Christmas was somewhat fraught, for reasons I won't go into here, but by the time dinner came around, it rescued itself, and we sat with our guests in their paper hats, courtesy of the British Christmas crackers we always get, and relaxed and had a great time. The Christmas pudding I had made before we went to London turned out just fine, and the hard sauce was like icing on a very good cake.
Hard Sauce
1 cup sweet butter
1 cup confectioners' sugar
1/4 cup dark rum, cognac or dry sherry
1/8 teaspoon salt
Cream the butter and confectioners' sugar together very well. Beat in remaining ingredients and chill thoroughly.
Makes about two cups.
Poppy Seed Cake
The poppy seed cake was intended to be dessert for Christmas Eve lunch. Our family has a series of family meals on Christmas Eve and Christmas Day. intended to accommodate my son and daughter-in-law, who have other commitments. We have lunch on Christmas Eve and read the Christmas story from St. Luke, The Night Before Christmas (during which the reader has to ham it up as much as humanly possible) and Beatrix Potter's A Tailor of Gloucester, when the reader, following the tradition of my father, has to read every piece of print in the book. "Frederick Warne and Company, copyright, 1911, copyright renewed, 1935," the reader solemnly intones.
At 5:00 we go to the family mass at Saint Margaret's Church, finally giving in to the reality that I could not stay awake for midnight mass. On Christmas Day, the yms and our friends come over for Christmas dinner about 4:00.
This year we flew to London for our daughter's graduation from her Master's Program, and arrived back on these shores on Sunday, suffering from a bad cold (my husband, Bob) and jet lag (the rest of us.) Monday was spent running around doing last minute errands, mailing packages that I hadn't managed to mail before we left for Britain and visiting the horse.
On Monday night, I had intended to make the cake, as well as peeling the chestnuts for chestnut soup. The chestnut soup recipe failed to mention that peeling two and a half pounds of chestnuts could take upwards of two hours. After an hour of picking chestnuts out of the shell and stabbing myself at least once, I tottered off to bed.
Tuesday was Christmas Eve. I had to go to the Post Office and did so. I got back about 11:00 am bearing drinks from Starbucks for the assembled multitudes, and started making everything else that would go into Christmas Eve dinner. It was plain that there was no time to make a cake or the soup, no matter how simple it might be to peal chestnuts. Christmas Eve dinner was, by our entertaining standards, spartan. Just main course, two side dishes and that was it. No dessert, no soup, no nothing. Everyone survived with good humor intact. At 4:15 the yms went out the door on their way to church. Bob, my daughter and I stayed home.
So Christmas Eve evening, I made the poppy seed cake and peeled the rest of the chestnuts. The only caveat I have about poppy seed cake is, these are ground poppy seeds. I took two 2.5 ounce jars of unground poppy seeds and tossed them into the Cuisinart. I probably netted upwards of three-quarters of a cup of ground poppy seeds. So I would say, buzz one jar of poppy seeds, measure them and figure how much more you need to get to half a cup. Also, you have to soak the poppy seeds for thirty minutes. As you do that, it's a good time to put the butter on the top of the stove so it softens. (Put it on a saucer. You don't want it to melt.)
This is a great cake. I ended up serving it at Christmas dinner, for those who declined Christmas pudding, or who decided they needed two desserts. The icing is a triumph. It reminded me of the icing on Joanne Bakers'
birthday cakes, sold in the 1950s in Great Barrington, Ma., Joanne's cakes were white with pink, yellow and blue roses on them. There was also a dove that rested near the roses. This icing is smooth, not grainy, fluffy, and altogether icing-like. And just think, home made!
Poppy Seed Cake
Cake
1/2 cup ground poppy seeds (grind 1/4 cup of poppy seeds in the Cuisinart. You will probably have enough.)
1 1/2 cups milk
2/3 cup butter
2 cups sugar
1/4 teaspoon lemon extract
1/2 teaspoon vanilla
3 cups cake flour
1 teaspoon salt
4 teaspoons baking powder
4 egg whites
Frosting
4 1/2 tablespoons cake flour
1 cup milk
1 cup butter
1 cup sugar
1 teaspoon vanilla
1/2 cup chopped walnuts
1. Preheat the oven to 350 degrees.
2. To prepare cake, combine the ground poppy seeds and milk and let stand thirty minutes. Cream the butter and sugar together until light and fluffy. Beat in the lemon extract and vanilla.
3. Sift together the flour, salt and baking powder and fold alternately with the milk mixture into the batter.
4. Beat the egg whites until stiff but not dry and fold into the mixture. Turn into three greased and floured eight-inch layer pans and bake about twenty minutes or until done. (In my oven it's always longer.)
5. Cool on a rack.
6. Meanswhile prepare frosting by blending the flour and milk together in a small saucepan. Heat, stirring, until thick. Cook two minutes until very thick. (Very thick is like icing in a can.)
7. Cream the butter, in a bowl. Gradually beat in the sugar until mixture is very light and fluffy. Gradually add cooled flour mixture and the vanilla. Beat five minutes longer. Use to fill and frost the layers. Decorate with the walnuts.
Makes one dozen servings.
Tuesday, December 10, 2013
Christmas Pudding (Gluten Free)
Today, I made the Christmas pudding. This made me feel like some 19th Century housewife, possibly Mrs. Cratchit. I gather, from reading I did as a child, that the Christmas pudding had to be made at least three weeks before Christmas, wrapped in muslin and stored in the cold store. In the 21st Century, we are going to London on Friday to see our daughter graduate from her master's program, so if I wanted to make this traditional dish, I had to get started early.
Christmas pudding is pretty much the same thing as plum pudding, which, by the way, does not contain plums. It is a steamed, bread and dried fruit based pudding dating from medieval times. In the 18th Century, the British referred to raisins as "plums" which is why we talk about plum pudding.
The pudding has a religious affiliation, with a tradition saying it should be made the 25th Sunday after Trinity Sunday, and that it contains 13 ingredients representing Christ and the 12 apostles. The pudding should be stirred by every member of the family stirring from east to west to celebrate the direction the Magi went to get to the Christ Child.. For your information, Trinity Sunday is a movable feast that occurs anywhere from the middle of May to the middle of June. In 2013 it was May 26.
I am not going to take the calendar off the wall and count Sundays. Certainly, today is Tuesday, not Sunday, so we are not following the ancient rule in this house. Also this pudding has 15 ingredients, which could include The Father and the Holy Spirit, if we wanted to be theological about it.
Dishes with unusual ingredients start with a veritable pilgrimage around the city looking for said ingredients. Since I wanted the pudding to be gluten-free, I had to go to Giant Food in Chevy Chase to buy gluten free bread crumbs. Giant, or at least that Giant, has an excellent selection of gluten free products. Otherwise, in my opinion, it's virtually worthless as a grocery store.
Then, there was the suet. Wagshalls, on Massachusetts Avenue, opposite the American University Law School, has suet. I went there today, with my tires spitting through the wet snow. Wagshall's also has a choice selection of high-end meat and a lady butcher. My husband Bob wants us to have beef tenderloin for Christmas dinner. "Buy it at Wagshall's" he said.
Personally, I think there ought to be a law that if the customer may have to take out a loan to buy a food product, the store has a responsibility to tell the customer how much the food product costs. In this case, it was $33 a pound, more than crab meat. I handed my ATM card over in a somewhat stunned condition and drove home with the tenderloin and the suet.
After taking Watson, the puppy, to frolic in the snow and having lunch, I settled down to make the pudding. There is nothing difficult about it.The hardest part of making this is finding the suet. I suggest a farmer's market in your town, with a farm that sells grassfed, home butchered beef. You just basically throw in all the ingredients, mix them up and put them into a greased pudding basin or 22 ounce can and steam away.
This recipe makes a lot of Christmas pudding, three in fact. We are only having 12 people to dinner on Christmas, not an entire clan, so I cut the recipe in half and made one 1 1/2 pound pudding.
Since the recipe says to put the basin or cans on a rack, it would probably be a good idea to do so. I don't have a rack that would fit in my stockpot, so I turned over a little baking dish and set the pudding basin on that.
When we get back from London on the 22nd, we will have our Christmas pudding in refrigerator, and we won't have to buy it at Heathrow!
Christmas Pudding
1 cup dark brown sugar
2 cups finely grated or ground beef kidney suet (This is also known as caul fat.)
1 cup soft bread crumbs (I used Aleia's Gluten Free Panko Crumbs, available at www.glutenfreepalace.com.)
1 cup currants
1 cup raisins
1 cup mixed candied fruit peels
1 cup finely chopped, peeled tart apple (like Granny Smiths)
2 cups flour (I used Bob's Red Mill Rice Flour to make it gluten free.)
1/2 teaspoon salt
1/2 teaspoon ground cloves
1/2 teaspoon cinnamon
1/2 teaspoon nutmeg
2 eggs lightly beaten
1 cup unsulphured molasses
1 tablespoon baking soda, dissolved in one cup boiling water
1. Mix together the brown sugar, suet, crumbs, currants, raisins, peels, apple, flour, salt and spices.
2. Beat the eggs and molasses together and add to sweet mixture. Stir in the dissolved baking soda. Spoon into greased one-pound pudding basins or coffee cans. Cover with wax paper and then a cloth or aluminum foil. Set in a steamer or on a rack in a pan with boiling water extending two-thirds of the way up basins or cans.
3. Steam three hours. Cool. store in freezer or refrigerator. Steam to reheat, about forty-five minutes. Serve with hard sauce. Makes three one-pound puddings.
Friday, November 29, 2013
Potage d'Haricots Rouges (Louisiana Red Bean Soup) (Gluten Free)

I planned to make this ahead of time for Thanksgiving, and got as far as boiling the beans with two ham hocks on Monday. When you look at the recipe, you will not find ham hocks. but I couldn't remember what the meat element was when I was at the grocery store, so I bought ham hocks.
This time two years ago, I had never eaten a ham hock. As I move into the southern chapters of the cookbook I have been introduced to these smoked pigs' ankles and have become a fan. Ham hocks are particularly good in soup. They add a rich, meaty, smoked flavor to the beans.
I had the ham hocks, so I used the ham hocks. Feeling virtuous because I was getting a start on Thanksgiving dinner, I instructed Bob to take the soup off the heat in an hour and a half and went off to do something else. Bob dutifully turned off the beans, and they sat on the stove for two days because I was always doing something other than moving on to the next step.
Thursday afternoon, I got down to the soup. I had skipped a step by boiling the beans and not adding the onions, bacon and garlic. So I sauteed the onions and garlic with the bacon, scraped them and the spices into the beans, added a tad (maybe a cup) more water and recommenced boiling. After half an hour, the beans were ready to be run through the blender.
"Time to get soup all over the wall," I announced to Tim and my brother, who were watching the Macy's Thanksgiving Day Parade and taste testing stuffing. In the past, I have painted the wall of the kitchen with a rainbow of different soups. I remember hot pumpkin soup going up like a perfect Vesuvius all over me and the wall under the horrified gazes of my children as I struggled not to spout a corresponding volcano of curses.
Years of doing this have taught me a few things. I don't fill the blender as full, and I don't get soup on the wall. Soup went from blender back into saucepan without adding to the decor. I took the ham hocks out and disposed of them. When I am making split pea soup, I cut the meat off the hocks, but not this time.
The soup was an enormous hit. Tim, an old Alabama boy, was fulsome in his praise. "This is superb," he said. Just for the record, Tim is always polite about what he eats, but he doesn't go nuts unless he really likes something.
This is a great soup for winter. Bean soup may not sound terribly elegant, but you could certainly serve this, dressed up with the chopped parsley and hard cooked egg, at a dinner party.
Louisiana Red Bean Soup
4 cups dried Louisiana red beans or kidney beans
1/2 pound lean slab bacon, without rind, cut into cubes
2 large onions, finely chopped
2 cloves garlic, finely minced
1 teaspoon celery seeds
1 teaspoon sage
salt and freshly ground black pepper to taste
tabasco sauce to taste
chopped parsley
chopped hard cooked egg
1. Soak the beans overnight in water that extends one inch above their level. (I did not skip this step, although I often do. It probably shortened the cooking time.)
2. Next day, drain the beans and put them in a heavy kettle. Add three quarts of water and bring to a boil.
3. Cook the bacon in a skillet until most of the fast is rendered. Add the onions and garlic and cook until onions are translucent. Add the celery seeds and sage. Season with salt, pepper and Tabasco and pour the mixture into the beans. Simmer the beans until they are very tender, two to two and one-half hours.
4. Let the beans cool and put them through a food mill or sieve or puree them, a little at a time, in an electric blender. If necessar, they may be thinned with a little broth or water. This soup will keep well in the refrigerator.
5. Heat the soup thoroughly and serve sprinkled with chopped parsley and hard-cooked egg and if desired, garlic croutons. Makes three and one-half quarts, about one dozen servings.
Uncooked Cranberry Relish
Please note this is a day before recipe. I did actually know this ahead of Thanksgiving Day. However, Wednesday was an unexpectedly busy day, but not in the kitchen. Wednesday morning, Bob and I drove out to Potomac Floral to buy wreaths for church along with a surprising stream of customers, usually women, buying a dazzling array of floral supplies. We got home around 11:45 when Bob suggested lunch.
"Tonight there will probably be plenty of food, so we don't have to worry about dinner," he said. I stared at him. "Say what?" He stared back with an expression indicating that I ought to know what he was talking about.
I sidled over to the wall calendar and was gobsmacked, as they say in the UK, to see that Dave and Nancy, our good friends, were giving a party that night for two of their children who had gotten married in the past year. This had been on the calendar for over a month, but I had completely forgotten. I had been mulling over the idea of buying a dress for this event, but hadn't done anything about it.
After lunch, I marched off to Lord and Taylor to check out the Woman's Section. I ended up buying a suit that received several complements, but I didn't do anything in the kitchen.
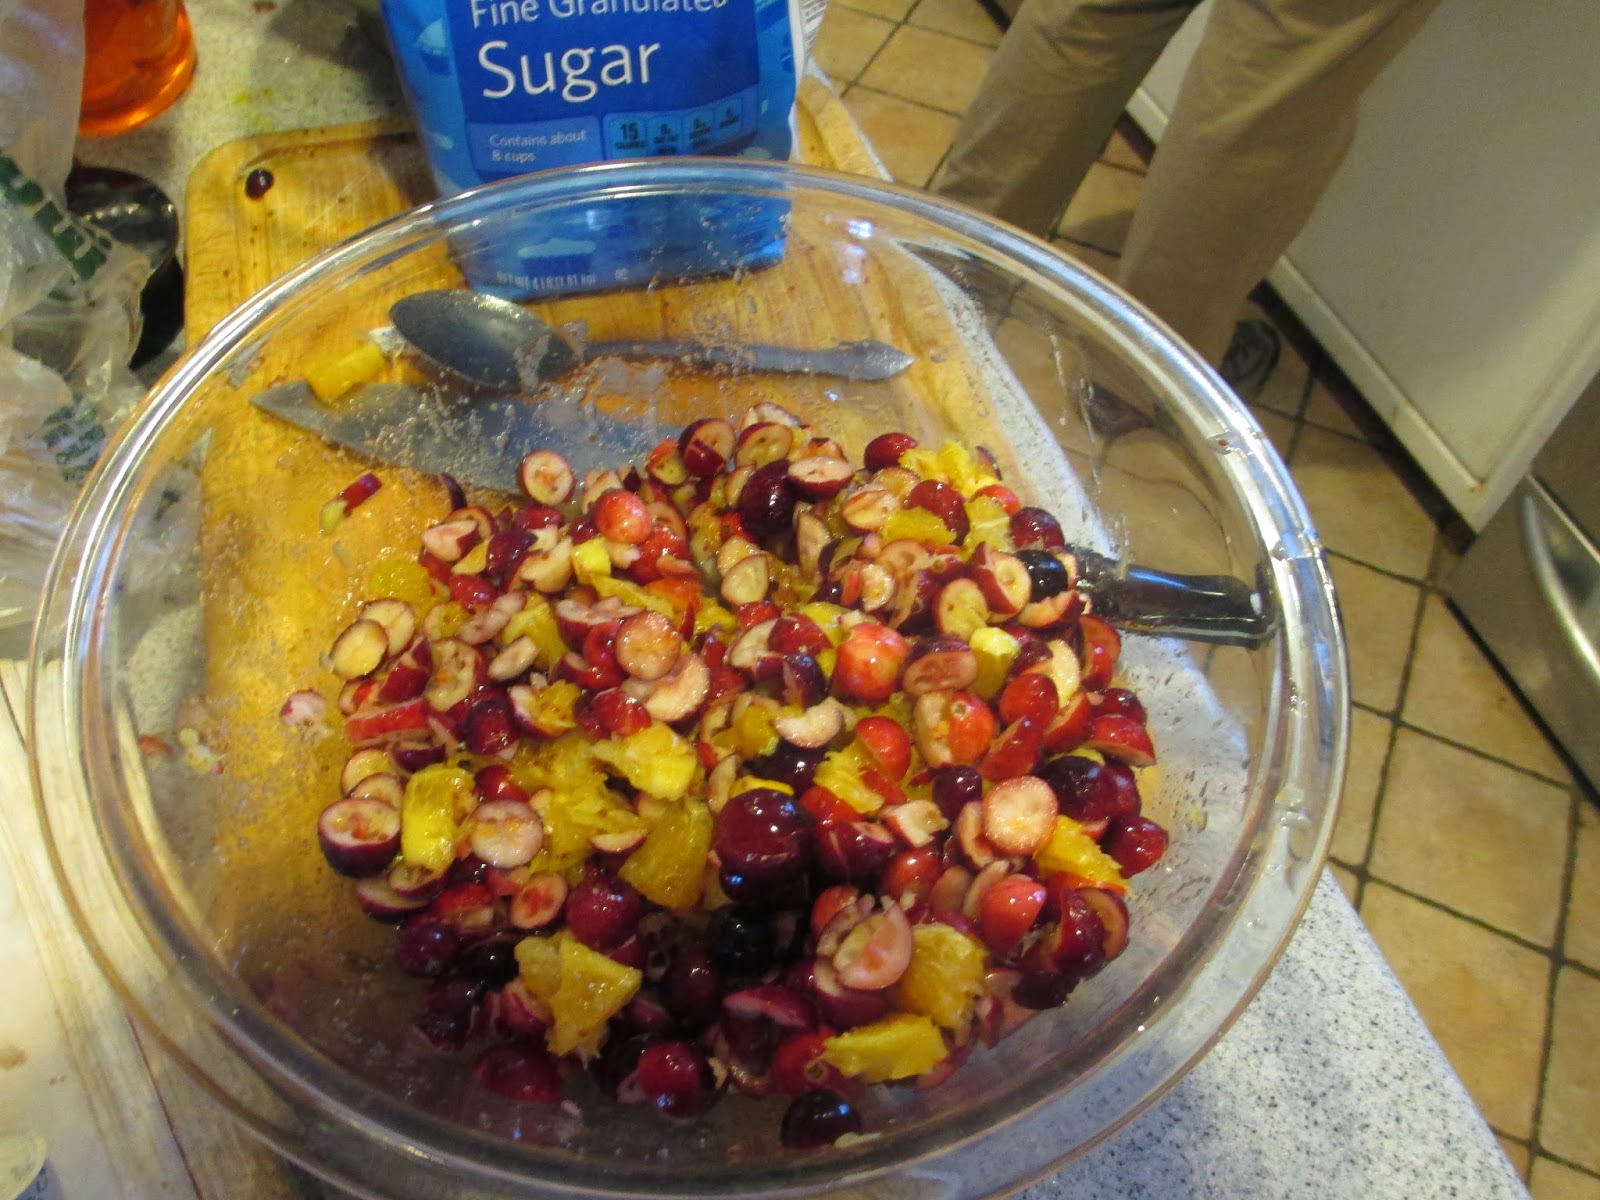
So it was that I made the cranberry sauce at 1:00 on Thursday when we were scheduled to eat at 4:30. It probably would have been more flavorful if I had made it 24 hours ahead as instructed, but basically it was fine the way it was.
And how was it? Crunchy, from the berries, not too tart, because of the ample supply of sugar in the dish, and flavorful from the chopped orange and orange juice. I would choose cooked cranberry sauce, but I wouldn't rule out this.
Uncooked Cranberry Relish
4 cups cranberries
2 seedless whole oranges
juice of one orange
2 cups sugar
Wash the cranberries well and chop them. Chop the oranges and add to the cranberries. Add the orange juice and sugar and mix well. Refrigerate twenty-four hours before serving. Makes about four cups.
Oyster Stuffing (Gluten Free)

I first had oysters at the Harvard Club when I was about 14. Being an adventurous eater, I was not squeamish about sliding an oval of slippery saltiness down my throat. I have loved them ever since, and hope to emulate our 90 year old friend, Mrs. Curtiss, who sends us a postcard every fall saying "I'm going to Paris to eat oysters." There can be few better ways of spending one's money in one's old age.
This oyster stuffing is obviously meant for a goose, since the first ingredient is butter or goose fat, moving on to a goose liver. Well. we were having turkey, so I used butter and extracted the turkey liver and chopped that up. This meant that Watson, the new puppy, could not participate in a canine Thanksgiving tradition, that of giving the dog a sauteed turkey liver. I'm sure he would have loved a turkey liver, but since he had never had one he wasn't upset.
I had to make two stuffings, one with oysters, and one without, for my shellfish allergic husband, Bob. Neither one was stuffed into the turkey, as Bob split the turkey open and roasted it in pieces. I made the oyster stuffing gluten free by using gluten free corn bread stuffing from Whole Foods. Oyster stuffing outside a turkey is perhaps a little dry. If you want to put it in a baking dish, cover the baking dish with aluminum foil and use more oyster liquor, which is a polite word for that glutenous stuff the oysters come in. Oyster juice, if you will.
We had gone to the Thanksgiving service at church and did not get home until after 11 am. I had done next to nothing in advance, in spite of my advice doled out with the Thanksgiving menus. I began with the oyster stuffing, since I wasn't baking any bread. I had in the back of my mind that the stuffing had to be finished so it could go in the turkey, even though we had been talking about spatchcocking it for a couple of weeks.
The oyster stuffing was done in half an hour, and what wouldn't fit in the baking dish went to my brother George who acted as taste tester. He pronounced it good and asked for it when it was time to fill the plates.
Another convert!
Oyster Stuffing
1/4 cup butter or goose fat
1 onion finely chopped
1/2 cup chopped celery
1 goose liver or turkey liver, chopped
6 cups stale one-quarter-inch white bread cubes (use gluten free stuffing, available at Whole Foods and other businesses that sell gluten free products)
2 cups oysters with liquor (oyster juice)
2 tablespoons chopped parsley
1 teaspoon salt
1/2 teaspoon freshly ground black pepper
1 egg lightly beaten
1/2 teaspoon thyme
1/4 teaspoon marjoram
1. Melt the butter in a skillet and saute the onion and celery in it until tender, but not browned. Add the liver and cook quickly two to three minutes. Put the bread cubes in a bowl and add the liver mixture.
2. Strain the oyster liquor, through cheesecloth if gritty, into a saucepan. Bring to a boil and add cleaned oysters. Simmer three minutes or until the edges of the oysters just curl.
3. Skim out the oysters and quarter them if they are very large, halve them if they are average. Add to the bread mixture.
4. Add the remaining ingredients and enough oyster liquor, usually about one-third cup, to moisten the dressing. Makes enough stuffing for a seven to eight pound goose or turkey.
Wednesday, November 20, 2013
Thanksgiving Menus

Well, it struck me that I could be somewhat useful to what readers I have. I know there are gradually becoming more of you, even if you never write in. So, here are some suggestions for Thanksgiving menus with recipes that appeared in the blog. I will try to give readers some idea of the difficulty or length of time it takes to prepare each dish.
The recipes will fall into the following categories. Soup or appetizer, side dishes, bread, dessert. The only turkey recipe in the New York Times Heritage Cookbook is Roast Oregon Turkey with Sausage Dressing. I prepared it prior to 1983 when my husband Bob started writing the dates next to the recipes. It was probably in the fall of 1978 when we had Thanksgiving at our apartment in Georgetown. I have a memory of that dinner, but no memory whatsoever of the turkey. If you don't have a basic cookbook like Joy of Cooking or Fanny Farmer, Google turkey recipes.
Soup
Soup can be made ahead of time. In fact, make your soup ahead of time. This weekend. Don't delay. The shellfish recipes are simplicity themselves.
Cream of Chicken Soup December 7, 2010 "Yummy, but time consuming"
Escarole Soup October 12, 2010 "Tasty but time consuming" Takes two days
Rivel Soup April 9, 2011 Starts with already made chicken stock. Relatively easy.
Appetizers
Scallops Mayonnaise November 23, 2012 "Takes all of 15 minutes. Could be made the night before."
 |
| Scallops Mayonnaise |
Crevettes Paula November 24, 2011 Crevettes are a fancy word for shrimp. Shelling shrimp can be time consuming. Two and one-half pounds of shrimp in shells makes one pound, or two cups of cooked shrimp. Can be done ahead of time.
 | ||
| Crevettes Paula |
Side Dishes
Mushrooms with Cream February 21, 2011, Fast and tasty. However, there was an issue with how long to boil the mushrooms and cream to achieve thickening. Perhaps, mixing in a tablespoonful of cornstarch to the cream before adding it to the mushrooms could achieve the same result.Fried Onions and Apples February 19, 2011. Takes maybe 20 minutes total, is seasonal and a part of Americana.
Green Beans, Southern Style September 22, 2013 These take up time boiling on the back burner, but need practically no effort.
 | ||||||||||
| Green Beans, Southern Style |
 |
| Baked Bourbon Spiced Sweet Potatoes |
 | |||||
| Cheese Grits Casserole |
Bread
Pumpkin Rolls November 24, 2011. The pumpkin makes these rolls a lovely orange color. Since it is a day before recipe, you can get everything but the baking out of the way on Wednesday night. They bake at 375 degrees, so you could put them in with the turkey. | ||||
| Pumpkin Rolls |
Flaky Rolls November 21, 2012 Unless you are a skilled baker, I would not attempt these on Thanksgiving. They are delicious, but they take hours to roll out, chill, spread with butter and chill again. They also bake at 475 degrees, which is too hot for the turkey. But they are really good. Make them some other time.
 | |
| Flaky Rolls |
Quahog Popovers September 8, 2013. Upside, these are easy to make, and very good. On the down side, they do bake at 425 degrees which will be too hot for the turkey. However, they only have to bake 25 to 30 minutes, so you could stick them in after the turkey comes out to rest. They don't have to rise. The only thing you have to remember is, the ingredients should be at room temperature, so you could take them out the night before.
Dessert
Winy Apple-Raisin Pie April 2, 2011. If your guests are mainly adults, and you have a non alcoholic dessert for the junior set, this is a little different turn on an old standard. You can make it the day before, or even over the weekend. Using ready made pie crust lowers the stress level considerably. The top may look complex, but, it's just strips laid one way over strips laid the other way. You don't have to weave the strips. | ||||
| Winy Apple-Raisin Pie |
Squash Apple Pie October 30, 2010 This pie can be made from steamed acorn squash, butternut squash, or pumpkin. The result is pumpkin pie-ish, because the spices are what make the pie. It can be made this weekend and put safely in the refrigerator, one less thing to juggle in and out of the oven. It also calls for a pie shell, which you can buy at the store.
French Silk Chocolate Pie April 15, 2012. Well, why not a chocolate pie? All the pies at Thanksgiving don't have to be apple or pumpkin. The Pilgrims might have had a chocolate pie if they traded with Africa where people grew cocoa beans. Time consuming, but not difficult. The cook has to beat 4 eggs into the melted chocolate one at a time, for five minutes each, making 20 minutes of beating. Since the pie is chilled, not baked, it can be made ahead of time, Friday night, if you wish. It's really good.
So, those are my suggestions. I hope somebody finds them useful. My overall advice is, 1. Make what you can ahead of time. 2. Think outside the box. 3. It doesn't have to be your grandmother's Thanksgiving. If you want to make lasagna, make lasagna. 4. I pass this one on from another foodie expert. Take out all your serving dishes early Thursday morning and decide what is going to go in what. Use sticky notes to remind you. If you don;t have a container for the fourth side dish, don't make it. Happy Thanksgiving.
Sunday, November 17, 2013
Minetry McCoy's Miracle (Dessert)

I decided to make M.M.M. because of a package of ladyfingers. Our daughter's friend, Laura, is living in our basement for a while. She offered us the ladyfingers. While there were several unmade recipes calling for ladyfingers in the southern section of the cookbook, this one looked like the best. My husband wanted to make Charlotte Russe, another dessert requiring ladyfingers, but I frankly couldn't see the point of a dinner party without at least one recipe checked off the list.
There are two issues. Number one is it uses raw eggs. My daughter advised using organic eggs. I buy organic eggs anyhow because of an article I read about some horrible substance that mass chicken farmers use to feed their chickens. Readers will have to use their own judgement on that. I can say, I am writing this on Wednesday after we ate it Saturday night, and no one has dysentery or other ill effects.
Number two is that of an ingredient, amaretti, or Italian macaroons. Thanks to the Internet, these are readily available for less than $5. Google will send you to a website called www.ilmercadoitaliano.net, which will allow you to order these tasty little cookies and have them on your kitchen counter in two or three days. Desdeforunamente, as they say in Spanish speaking countries, I did not avail myself of this wonderful cooking resource. At 8:00 on Friday night, I realized I didn't have the cookies and got on the phone to Safeway. Safeway didn't have them. So I hopped in the car and went up to Whole Foods, where the cocktail party they run every Friday night had just dispersed. I wandered around Whole Foods for about 15 minutes in a daze of fatigue, but amaretti were not to be found.
It's kind of a technical problem because there are already two radically different kinds of macaroons on the market, neither of which I wanted. I didn't want coconut macaroons, and I didn't want what I can only term French macaroons, which are the scarlet, fuchsia, violet and baby blue cookies that look something like tiny hamburgers in rainbow colors. Bob had said amaretti look something like vanilla wafers.
So, after a last scan of the cookie shelves, I grabbed a box of vanilla wafers. The first instruction is for the amaretti to be soaked in bourbon. However, the little wheels in what my children occasionally call the pea brain were turning. Since amaretti and amaretto were virtually the same word, how about sprinkling the vanilla wafers with amaretto, the Italian liqueur famous in my house for making mai tais? That's what I did. I didn't use as much amaretto as the recipe called for, to hold the cookies together. As it was, they were somewhat soggy.
I beat the egg yolks before I creamed the butter and sugar, figuring it was probably okay to cream the butter and sugar with a little egg yolk.the directions say beat until light in color. I beat my egg yolks for about four minutes. One would need paint chips to detect lightness, but it seemed to be fine. I mixed in the melted chocolate, vanila, pecans (after a discussion of what you call them,) (Is it peCANS, pee-cans, or what?) and whipped the egg whites. In the meantime, Bob, my husband, dealt with the ladyfingers. The recipe says split them, assuming they are similar to cake. These were similar to cookies, so they could not be split. He lined the spring form pan with them.
After that, I lined the base of the pan with the vanilla wafers, and began layering chocolate mixture and cookies. All went into the refrigerator.
The next night, before the guests came, Bob decanted the miracle. Unfortunately, he hadn't see the picture of the completed miracle and took it out of the pan upside down. What we see in the picture is a mosaic of vanilla wafers, not the lovely yummy chocolate topping. But I must say, it did not detract from the guests' enjoyment of the dessert. This one is definitely a keeper. Hats off to the inventive Ms. McCoy.
Minetry McCoy's Miracle
1 pound sweet butter
2 cups sugar
12 eggs, separated
48 amaretti (Italian macaroons)
1 cup bourbon
4 ounces (four squares) unsweetened chocolate, melted
1 teaspoon vanilla
1 cup chopped pecans
24 double ladyfingers, approximately
1 1/2 cups heavy cream, whipped
1. Day before, cream the butter and sugar together until light and fluffy. Beat the egg yolks until light and beat into creamed mixture.
2. Soak the amaretti in the bourbon. (or amaretto, if you prefer.)
3. Beat the chocolate into the butter mixture. Add the vanilla and pecans. Beat the egg whites until stiff but not dry and fold into the chocolate mixture.
4. Line a ten-inch springform pan around the side and on the bottom with split ladyfingers. Alternate layers of soaked macaroons and chocolate mixture in the lined pan. Chill overnight.
5 Next day, remove the sides of the pan and decorate the top of the dessert with whipped cream. Makes sixteen to twenty servings. (Minetry believed in modest little slices, apparently. We got about 10-12 servings out of this.)
Saturday, November 9, 2013
Mince Pies

I got the suet at Wagshall's, a fancy butcher shop on upper Massachusetts Avenue in DC. The place was packed with local residents ordering meat for the weekend. Filets of beef and thick porkchops flew off the counter. Wagshall's keeps the already ground suet in the freezer, since it turns rancid easily.
The suet was step one. I took it out of my purse (to avoid the bag tax) and left it on the counter to defrost.
Step two was reread the recipe. I was somewhat surprised to learn that this mincemeat was not cooked. In fact, the directions said to mix it by hand. The canning instructions looked a little suspect. "Turn into clean jars and store, covered in a cool, dark, dry place. The mincemeat will keep for months." hmm.
I believe in making things easy for myself, so the first thing I did was put the stew pot on the stove and throw the semi-defrosted suet into the pot. Having made three different kinds of mincemeat prior to this, I know that mincemeat is sticky, and that suet will not incorporate easily into the dried fruit. So, melt the suet.
The ingredients call for a dazzling array of dried fruit, some available at supermarkets, and some not. I advise getting the currents, the citron peel and the mixed candied fruit peel at www.nuts.com. This online business has a folksy story about being started by Grandpa as a tiny roadside fruit stand during the Depression, and now being run by Grandpa's grandson. That is all well and good, but they do have these hard-to-find ingredients, and they ship fast.
The recipe says grind the fruit. I say, Cuisinart. I can't imagine trying to grind all this sticky dried fruit in a hand turned grinder. Actually, I can imagine it. Endless hours spent scraping out the inside of the grinder and picking the dried fruit out of the holes of the blade. Olvidate! Which is Spanish for fuggetaboutit. So, I buzzed the fruits in the Cuisinart, great sticky wads of dried fruit and stirred it all together in the big canning pot.
Right now, it is still in the pot, in the refrigerator. Saint Margaret's Sunday is November 17. I will make some little pies for the post church feed, and can the rest of it the traditional way.
This mincemeat has the right taste and texture. I endorse this mincemeat recipe over Venison Mincemeat. Unless you are an unremitting mincemeat fan, or have a very large mincemeat loving family, you could cut the recipe in half with no ill effects. You would make 3 pounds instead of six pounds, which would be enough for two to three standard size pies. If you think you want to make this for Thanksgiving, order your dried fruit now.
Mince Pies
1 pound beef suet ground
1 1/12 pounds golden raisins, ground
1/2 pound prunes, pitted and ground
1/2 pound dates, ground
1/2 pound mixed candied fruit peels, ground
1/2 pound citron peel, ground
3 tart green apples, peeled, cored and grated or finely chopped
1 1/2 pounds currents
1 pound dark brown sugar
6 ounces chopped blanched almonds
grated rind and juice of two lemons
1 teaspoon nutmeg
1 teaspoon cinnamon
1/2 teaspoon ground ginger
1/2 teaspoon allspice
1 teaspoon salt
1/2 cup dark rum or cognac
Pastry
short crust pastry for two-crust pie
1 egg, lightly beaten
1. Combine all the mincemeat ingredients very well, using the hands. Turn into clean jars and store, covered, in a cool, dark place. The mincemeat will keep for months.
2. Preheat the oven to 425 degrees.
3. Roll out half the pastry to one-eighth-inch thickness and cut into two-inch circles. Fit into small muffin tins. Fill with mincemeat. Roll out remaining pastry and cut tops to fit the pies.
4. Moisten the edges and pinch to seal. Make a steam hole in each pie, brush with egg and bake about twenty-five minutes, or until golden brown. The pies are best eaten warm. Makes six pounds mincemeat; pastry makes one dozen little pies.
No-Fail Welsh Rabbit (Gluten-free)
Welsh Rabbit was one of those magic foods I lusted after in my meat and two vegetables eating childhood. For some reason, it featured heavily in young people's books of the early 20th Century. Boys at boarding school induced their families to send them large wheels of cheese, which they used to make welsh rabbit during midnight feasts. I drooled over the descriptions of those midnight feasts, even though they usually involved some peculiar ingredient that took the place of the beer.
I can't remember the first time I ever had welsh rabbit, but I do remember making it in August, 1978, during the week I slept in my office in Centerville, a tiny town on the Eastern Shore of Maryland. I had gotten my first journalism job, and decided to save money by moving out of the boarding house in Easton, and crashing at the office. Luckily, the office was equipped with a kitchen and, I guess, a few pots and pans. Welsh rabbit is cheap, which might explain why there are no fewer than four rabbit-like recipes for cheese dishes in the Southern section of The New York Times Heritage Cookbook. Cheddar cheese seems like a New England product, but I guess none of the New England contributors thought to send in a recipe for what my mother's generation remembered as something their fathers used to make during the cook's night out.
I made the Welsh Rabbit on Thursday night after dog training class. We are trying to learn to control the puppy who is a lovely dog, but can be completely insane. The rabbit took all of five minutes, about half the time that Bob took to make the salad. The only thing you need to be careful about is stirring in the eggs. Do not overcook or the eggs will scramble, the recipe says. Keep it on a low heat, 4 on a gas stove, or less, and stir it.
No-Fail Welsh Rabbit (Gluten Free)
2 tablespoons butter
2 tablespoons flour ( I used gluten free flour. Rice flour works well too.)
1 cup stale beer
2 cups cubed sharp Cheddar Cheese
2 eggs well beaten
1/2 teaspoon dry mustard
1 tablespoon Worcestershire sauce or to taste
salt to taste
Cayenne pepper to taste
4 slices toast
1. Melt the butter and add the flour. Stir in the beer. When the mixture is thickened and smooth, add the cheese, stirring.
2. When the cheese is melted, add the eggs and cook just until the eggs thicken. Do not overcook or the eggs will scramble. Add the Worcestershire , salt and cayenne. Serve with or on toast. Makes four servings.
Sunday, November 3, 2013
Clam Souffle

Saturday night we served up two main courses. I made clam souffle and Bob made chicken piccata. Safeway was out of rice flour, so it was not gluten free. If you want gluten free clam souffle, use rice flour instead of wheat flour. We were cooking and cleaning at the same time, so I didn't get started on the souffle until just before the guests actually walked in the door. Really, that worked out fine, as souffles have to be made, baked and eaten with dispatch. You don't want them sitting around, as my son would say, festering.
I had the base, the butter, flour, clam juice and cream made before I bolted upstairs for a shower. It was supposed to cool slightly so that gave it the opportunity to do so.
Back downstairs, I separated the eggs. Note that this recipe makes two souffles and uses 12 eggs. It would be easy to cut it in half. When you are separating eggs and need a large quantity of egg whites, separate each egg into a small bowl, and add the egg white to the other egg whites. That way, you avoid contaminating eleven egg whites with a tiny bit of yolk from number twelve. If you do end up contaminating an egg white, you can add it to the four left over yolks for scrambled eggs the next morning.
Honestly, souffles are not particularly difficult if you possess a hand mixer. If you have never separated eggs, watch a you tube video and then practice with a dozen eggs. If you mess up, you can have scrambled eggs. Anyone can separate eggs with a little practice. Just don't be scared of the egg.
I beat the egg whites, folded them into the base and popped the souffles into the oven in their buttered dishes. The diners were full of complements. I found clam souffle somewhat bland. The clams don't have a great deal of taste, but that's just my opinion. If you like lightly flavored foods, go to it. You could also add things, like Parmesan cheese for extra flavor.
Clam Souffle
6 tablespoons butter
6 tablespoons flour
1 cup clam juice
1 cup heavy cream
1 1/2 cups minced canned clams
8 egg yolks
1/4 cup freshly chopped parsley
salt and freshly ground black pepper to taste
grated nutmeg to taste (about 1/2 teaspoon)
12 egg whites
1. Preheat the oven to 375 degrees.
2. melt the butter and blend in the flour. Mix the clam juice and cream and slowly add to the butter-flour mixture, stirring constantly. Cook, stirring, until thickened. (How thick? Kind of like cake batter, if that's any help.) Add the minced clams and remove from the heat to cool slightly.
3. Beat the egg yolks thoroughly and add to the sauce. Stir in the paresley and season with salt, pepper, and nutmeg.
4. Beat the egg whites until firm. Fold them thoroughly into the sauce. Pour into two buttered two-quart souffle dishes and bake thirty-five minutes. Makes ten to one dozen servings.
Thursday, October 31, 2013
Black-eyed Pea Soup (Gluten Free)

To combat blandness, and , he confessed because he didn't read the recipe all the way through, Bob put the four slices of lemon that were supposed to be a garnish into the soup. The result was a piquant, lemon infused soup where the smokiness of the ham hock blended with the lemon flavor to produce something very nice indeed.
The recipe as written is supposed to be cooked on top of the stove, but 4 hours on high in the slow cooker produces the same result. He also did not soak the beans. I suspect that Monsanto or some other agribiz company has fiddled with the genetic make up of dried beans so we no longer have to soak them. Please note that this is only an opinion, not an accusation. I have no direct information about what Monsanto does or does not do.
So when I got home from a hard night of dialing the telephone numbers of Marylanders who were not home, or not answering their phones, we ate hot soup. (In case you are wondering why I would be calling residents of Maryland during a campaign to elect the governor of Virginia, we were combing the Obama lists for people to volunteer to knock on doors on Election Day.
By the way, black-eyed peas are actually beans, like kidney beans, and are eaten all over the world.
Black Eyed Pea Soup
2 cups dried black-eyed peas
cold water
1 small ham hock (Ham hocks from Safeway are huge. As far as I am concerned, bigger is better here.)
4 cups boiling water
1 bay leaf
2 ribs celery, coarsely chopped
1 onion, studded with two whole cloves
salt to taste
4 peppercorns
4 thin slices lemon
paprika
1 teaspoon finely chopped parsley
1. Soak the black-eyed peas over night in cold water to cover. Next day, drain and place in a two-quart kettle. Add the ham hock, boiling water, bay leaf, celery, onion, salt and peppercorns (and lemon slices )and bring to a boil. Cook until peas are tender, two and one half hours to three hours. As the soup cooks, skim the surface as necessary.
2. Remove the ham hock and bay leaf and puree the soup either through a sieve or in an electric blender. Spoon into four hot soup plates and top each with a slice of lemon. Dot the center of each lemon slice with a little paprika and one-quarter teaspoon chopped parsley.
Monday, October 28, 2013
Venison Mincemeat
One may also find venison on the Internet. www.brokenarrowranch.com is one of several businesses which sell venison by mail. I have never ordered from them. I am merely passing on the information.
Anyhow, I bought a frozen, two pound slab for about $29, and toted it home to defrost it. The recipe calls for Northern Spy apples. Unfortunately, Homestead Farm in Poolesville doesn't have Northern Spies. I got Staymans, an apple that was described as a good cooking apple, with a thick skin.
The recipe envisions the cook using the leftover venison, the tough cuts. Well, those of us without farms or a hunter in the family to bring down your deer, are not going to have tough cuts. The venison I got was insanely tender, as though the deer it came off had spent its entire career sitting in a lounge chair drinking mai tais and having massages.
In order to deal with the supposed toughness of the meat, the cook is ordered to boil it until it becomes tender. I followed these instructions, with mixed results. This is a problem with Hewitt's recipes. The author probably made venison mincemeat every fall, after deer season. She/he knew how much water it took to boil the meat, etc. I didn't know how much water to use. You might try just adding everything and then cooking it without the pre boiling and be very sparing with the water.
Initially, my mincemeat was more like soup and less like a pie filling that could be dished out in ice cream scoops. I ended up boiling it for three hours to bring down the water content. The result was not satisfying in texture. The apples had virtually disintegrated, and the raisins were huge. I ground the meat in the Cuisinart, which left it very fine. You might want to try to get the venison already ground for a better texture.
Venison Mincemeat
5 pounds tough cuts venison, very finely cut or diced
1 tablespoon plus one-quarter teaspoon salt
4 pounds Northern Spy apples, peeled, cored and chopped
2 cups cider, scalded
1 cup unsulphured molasses
2 cups honey
2 cups sugar
1 teaspoon ground cloves
1 teaspoon cinnamon
1 teaspoon ground allspice
1/2 pound raisins
1 pint blackberry brandy
1. Cover the venison with cold water. Add one tablespoon salt. Let stand at room temperature two hours. Drain and place in a kettle.
2. Cover with fresh water. Add remaining salt and the pepper and cook, covered, until meat is very tender.
3. Add the remaining ingredients except the brandy. Bring to a boil and simmer until apples are tender. Cool.
4. Add brandy, reheat almost to the boiling point and pack into hot sterilized jars. Seal. Cool and store in a cool, dry, dark place for at least one month before using. Makes eight quarts.
Monday, October 21, 2013
Amber Pie (Gluten Free)

Amber Pie is relatively quick, which is a feature that appeals to me in desserts these days. On Saturday, our friend Geoffrey and my brother George came to dinner. I got started late because I decided that the India Relish could not wait another day. I didn't get home from the grocery store until nearly 5:30 and had to hasten to get the pork roast on the barbecue. We don't grill for months at a time, but we decided to grill in honor of Geoffrey who paid 2,000 smackers for a mammoth item that grills, fries, steams and plays God Bless America, for all I know.
So I had to make the pie in between running in and out the door adding briquettes to the barbecue so we could eat before 10 o'clock. Like I said, it's fast. One does not have to spend half an hour or more stirring the ingredients over a double boiler and then chilling the result for four to five hours. It's mix, pour, bake. A meringue is spread on the cooled pie, which is then baked another 15 minutes.
Meringues are actually pretty easy. You just beat egg whites with sugar until the egg whites are stiff. If you have never separated eggs or beaten egg whites, get a dozen eggs and practice. You can reintegrate the whites and yolks and use them for scrambled eggs. That way, if you get egg yolk in your egg whites, it really doesn't matter. If you want to practice beating egg whites, you cannot get egg yolk in your egg whites because the egg whites won't beat properly.
The pie baked up nicely and was well received. It has a sweet-tart taste due to the vinegar. I substituted regular milk left to sit for 20 minutes with a teaspoon of vinegar in it for buttermilk. I imagine if I had used buttermilk the sweet tart taste would have been more pronounced.
I used a gluten free pie shell, (available at Whole Foods) and rice flour to make the pie gluten free.
Amber Pie
3 eggs, separated
1 cup plus six tablespoons sugar
1/2 cup buttermilk (Some Safeways carry buttermilk. Whole Foods sells it also.)
1/4 teaspoon allspice
1 tablespoon flour (use rice flour if you want to be gluten free)
1 1/2 teaspoons cider vinegar
1/2 cup chopped nuts
1/2 cup raisins
1 unbaked pie shell (Gluten free if necessary.)
2 tablespoons butter
1 teaspoon vanilla
1. Preheat the oven to 400 degrees.
2. Mix together the egg yolks, one cup of the sugar, the buttermilk, allspice, flour, vinegar, nuts and raisins. Pour into the pie shell.
3. Dot with the butter and bake about forty-five minutes or until golden brown and firm. Cool slightly.
4. Reduce the oven heat to 450 degrees
5. Beat the egg whites until frothy and gradually beat in the remaining sugar until mixture is stiff. Add the vanilla.
6. Spread meringue over pie and bake ten to fifteen minutes, or until meringue is lightly browned. Makes six servings.
Hancock Shaker Village India Relish

Last Wednesday, Bob and I hustled out to the Bethesda Women's Farm Market early to buy our green tomatoes. At first I was afraid that I would have to drive to the Homestead Farm in Poolesville, which, this time of year, is like a convention center for preschoolers and their teachers. Yellow buses park in ranks, disgorging young kids to visit the pumpkin patch. But, luckily, I was spared the drive, as a man named Ray had baskets of lovely pale green tomatoes at his stall.
On Saturday afternoon, after noticing that the green on the tomatoes was starting to shade into a pale orange in a few spots, I decided I had better get busy and turn the tomatoes into relish before they all ripened. This happened twice last year. Baskets of green tomatoes became red tomatoes before I got around to canning them. So even though I had to go to the grocery store. I began chopping and measuring.
The only potentially hard to find ingredient in this recipe is citron. Citron, according to Wikipedia, is an actual citrus fruit. However, the pulp, the part of the other citrus fruits we eat or squeeze into juice, is not very good. What you get when you buy citron is the candied flesh of the inner rind. It is used for fruit cake, mincemeat and other vaguely esoteric foods. You can buy it on line at .www.nuts.com, among other places.
The relish is sweet and tart at the same time, due to the vinegar and sugar. In the 19th century, cooks served relishes to spark up their meals. Wikipedia says that relishes came from India. However, the website warns that the article on relishes "has multiple issues" so we can take that with a grain of salt (or sugar.).
You may be wondering what to do with India relish once you make it. First of all, you have to remember you have it. Bob wants to move all the canned goods canned by me downstairs to the laundry room where they could be displayed on shelves at eye level. Right now, they are all jammed together on a shelf in the upper reaches of the pantry. then, I would do what the 19th Century cooks did, and serve your relish with a meat dinner, roast chicken, roast beef, roast pork. Or, you can spread them on crackers and make an hors d'oeurve with brie or cheddar cheese and a dab of relish.
This recipe requires sealing in a boiling water bath. That means a great big canning kettle with a rack so you can lift up the jars. Hewitt does not give us any guidance about time. Sadly, neither do the various state cooperative extensions that have websites devoted to safe canning. I guess it is a bit much to expect home extension agents to determine canning times for every conceivable food people want to can. The website Seasoned Advice, at www.stackexchange.com, suggests that the cook use the processing time for the ingredient with the longest processing time. In this case, the processing time would be 40 minutes. Don't forget to sterilize your jars and lids.
Hancock Shaker Village India Relish
8 pounds very small green tomatoes (you may have to make do with regular-size tomatoes)
8 cups light brown sugar or maple sugar
2 cups water
3 sticks cinnamon
2 tablespoons ground ginger
3 lemons very thinly sliced
2 cups citron, shredded. (It comes diced now.)
3 cups raisins
Peel of one small orange, finely chopped
1. Wash to tomatoes and cut into quarters (or smaller pieces if using regular size tomatoes)
2. Bring the sugar and water to a boil, stirring until the sugar dissolves and simmer tow to three minutes. Add tomatoes and remaining ingredients. Simmer, stirring, three hours, or until lemon slices and citron peel look transparent and tomatoes are very tender. Pour into hot sterilized jars and seal. Cool and store in a cool, dark, dry place. Serve with cold meat. Makes eight to ten pints.
Friday, October 11, 2013
Angel Food Cake

I made this angel food cake because my son and daughter-in-law were coming to dinner. I wanted something easy. If you have an electric mixer, and who does not in these days, angel food cake is easy. You beat, mix, pour and bake. No standing over a hot stove stirring some concoction that does not want to thicken. You do need a big bowl. Twelve egg whites beaten takes up a lot of space.
I can see why they call it angel food cake. In the bowl, the batter is pure white, as a child might imagine the robes of angels. It is also very fluffy, of course, with all those egg whites.
Readers might be puzzled by the picture. The directions for angel food cake tell the cook to stick the neck of the cake pan into a bottle, and let the cake cool upside down. This is a picture of my angel food cake cooling over the neck of a bottle.
There is very little about the angel food cake to be intimidated by. One thing I suggest, is breaking your egg whites into a small bowl and adding them one at a time to the large bowl you plan to beat them in. That way, if your eleventh egg white gets some yolk in it, you have not contaminated an entire dozen eggs.
The recipe says not to grease the pan. This is important. The batter, as it rises, clings to the side of the pan and therefore stays up.
Wikipedia says angel food cakes are usually not served frosted, but with some kind of a sauce poured over. Bob, when informed that there was no frosting, went rummaging in indignation through the jams and jellies collection and heated up ginger marmalade to pour over the cake. That worked, and so would any other jam that you prefer.
Angel Food Cake
1 1/3 cups sugar, sifted twice
1 cup sifted cake flour
1/2 teaspoon salt
1 1/2 cups egg whites, (about 12 whites)
1 1/4 teaspoons cream of tartar
1 teaspoon vanilla
1/2 teaspoon vanilla extract
1. Preheat the oven to 350 degrees.
2. Add one-third cup of the sifted sugar to the cake flour. Add the salt and sift the mixture together three times.
3. Beat the egg whites, preferably with a wire whisk (ahem, unless you are some sort of off the grid purist, use a hand mixer.), until they are foamy and add the cream of tartar. Continue beating until whites are stiff but not dry. Gradually beat in the remaining sugar, one tablespoon at a time. Fold in the vanilla and almond extract. Sift approximately one-quarter cup of the sugar and flour mixture over the batter. Fold in with a rubber spatula. Continue adding the sugar and flour mixture, folding in after each addition.
4. Pour the batter into an ungreased nine-inch tube pan. Bake about fouty-five minutes, or until the top springs back when lightly touched. Immediately turn the pan upside down, suspending tube part over the neck of a funnel or bottle. Let cake stand in the pan until cold, about one and one half hours. Makes enough cake to serve ten.
Subscribe to:
Posts (Atom)