Yesterday, I shook off a lassitude so great that I did not even go to the gym, where I have been going faithfully for two hours a day, ever since school got out. I have an ulterior motive. I'm going to a hiking conference in Virginia on the first of July, and I don't want all the other hikers to finish two hours ahead of me. It's a given that they will all finish ahead of me, but I would like it to be no more than ten or 15 minutes. In seven years of hiking on the Appalachian Trail, I have only passed one person. And I had some real reservations about whether that person should even be out on the trail. So, we're talking slow here.
But anyway, I ran through my options. I could begin to pack. I could get a red city bike and ride around. I could clean up, or I could can, since I was running through these deliberations at 10:30 in the morning and had nearly the whole day. As I said, I'm trying to give attention to underused sections of the cookbook. The section on Pickles, Relishes and Preserves has had some of the recipes crossed off, but it's not like I spend my winter days putting up jars of pickles.
After spending a few minutes leafing through the stained and sticky pages and rejecting pickles because I didn't think cucumbers would be ready yet, (they were, actually), I settled upon Lemon-Peach, blah blah because hey, it's peach season. The whole point of "putting up" fruits and vegetables" is to preserve things while when they are fresh.
So I went off to the Bethesda Women's Farm Market, a little building that serves as a testament to the fact that Montgomery County was not always paved end to end with suburban cul-de-sacs and mini mansions, but was once farmland. It's kind of sad because out of the 20 or so stalls, only five or six actually sell something that grows in the ground. The rest sell artisanal soap, or take out food of varying ethnicities, or hand made jewelry.
The lady with the stand closest to the back door had three or four different kinds of peaches. I opted for the biggest kind, since that would result in less peeling. Peaches have been really good this year, although generally small because we're in a drought. I don't know if these came off of her irrigated trees, or what. I didn't ask, I merely bought. The women don't sell non local produce once their own fields and trees start to bear, so I had to go to Giant to get a lemon and an orange. I even got almonds, which I forgot to put in later.
I faithfully chopped the orange and lemon, and peeled the peaches. To peel peaches, you stick them in a pot of boiling water, and depending on their ripeness, fish them out immediately, or go off and read a book for five minutes. Some of my peaches were not altogether ripe, which the nice farm stand lady had tried to warn me about. It's tricky, selecting ripe peaches. If you squeeze them too hard, you bruise them, thereby ruining the fruit for the next person. About 75 percent of the peaches I selected were ripe. The others were hard like golf balls, so I just left them in the water longer and sliced off chunks of the sides of the peach, instead of trying to peel the peel off delicately leaving the entire peach.
This effort in the jam area came out better than the others. For one thing, I didn't have to add water, so I didn't have to boil the result for days. The fruit provided enough juice to be able to boil the mixture as intended. It thickened after something like 40 minutes. It was also helpful to consult The Joy of Cooking. Mrs. Joy, as Meryl Streep referred to her in the movie Julie and Julia, gives very comprehensive instructions about things like canning. One of her tidbits was that you could tell the jam was done when the fruit was translucent. A note to others who may want to try this. Don't be lazy. Stand at the stove and stir. Otherwise, the fruit rather quickly starts to burn and stick to the bottom of the pan.
The result is a little darker than I think nature intended, but altogether delicious. A conserve is a whole fruit jam made of fruit stewed in sugar. At least that's what Wikipedia says, and who am I to argue with some dude in his mother's basement? Although that doesn't really make sense, because the peaches, and the citrus fruits were sliced and chopped. Who knows?
This is a relatively quick canning effort. It doesn't have to be soaked for days, or boiled for months, or anything. It was in its neat little jars, with the paraffin hardening on top, by 4:00, just in time for me to take the Corgi for a walk.
Lemon-Peach-Ginger Conserve
1 large lemon or two small lemons, finely chopped
1 small orange, finely chopped
7 cups scaled, peeled and chopped firm ripe peaches, with all bruised spots removed
5 cups sugar
1/2 teaspoon ground ginger, or one-quarter cup chopped crystallized ginger (I put in 1 teaspoon.)
1/2 cup blanched, slivered almonds
1. Combine the lemons, orange, and peaches in a stainless steel or enameled kettle and simmer gently fifteen or twenty minutes until orange and lemon skins are tender. (I found this took considerably longer, maybe 40 minutes.)
2. Add the sugar and ginger and birng to a boil, stirring until the sugar is dissolved. Boil rapidly until mixture sheets off spoon. (This means when you tilt your spoon sideways the fruit runs off in a sheet, instead of glopping off.) or registers 220 degrees on a candy thermometer. Add almonds during the last five minutes of cooking.
3. Pour into hot sterilized jelly glasses. Pour two thin layers of melted paraffin over. Cool. Cover and store in a cool, dark, dry place. Makes about eight and a half pints.
Wednesday, June 29, 2011
Deep-Fried Mushrooms
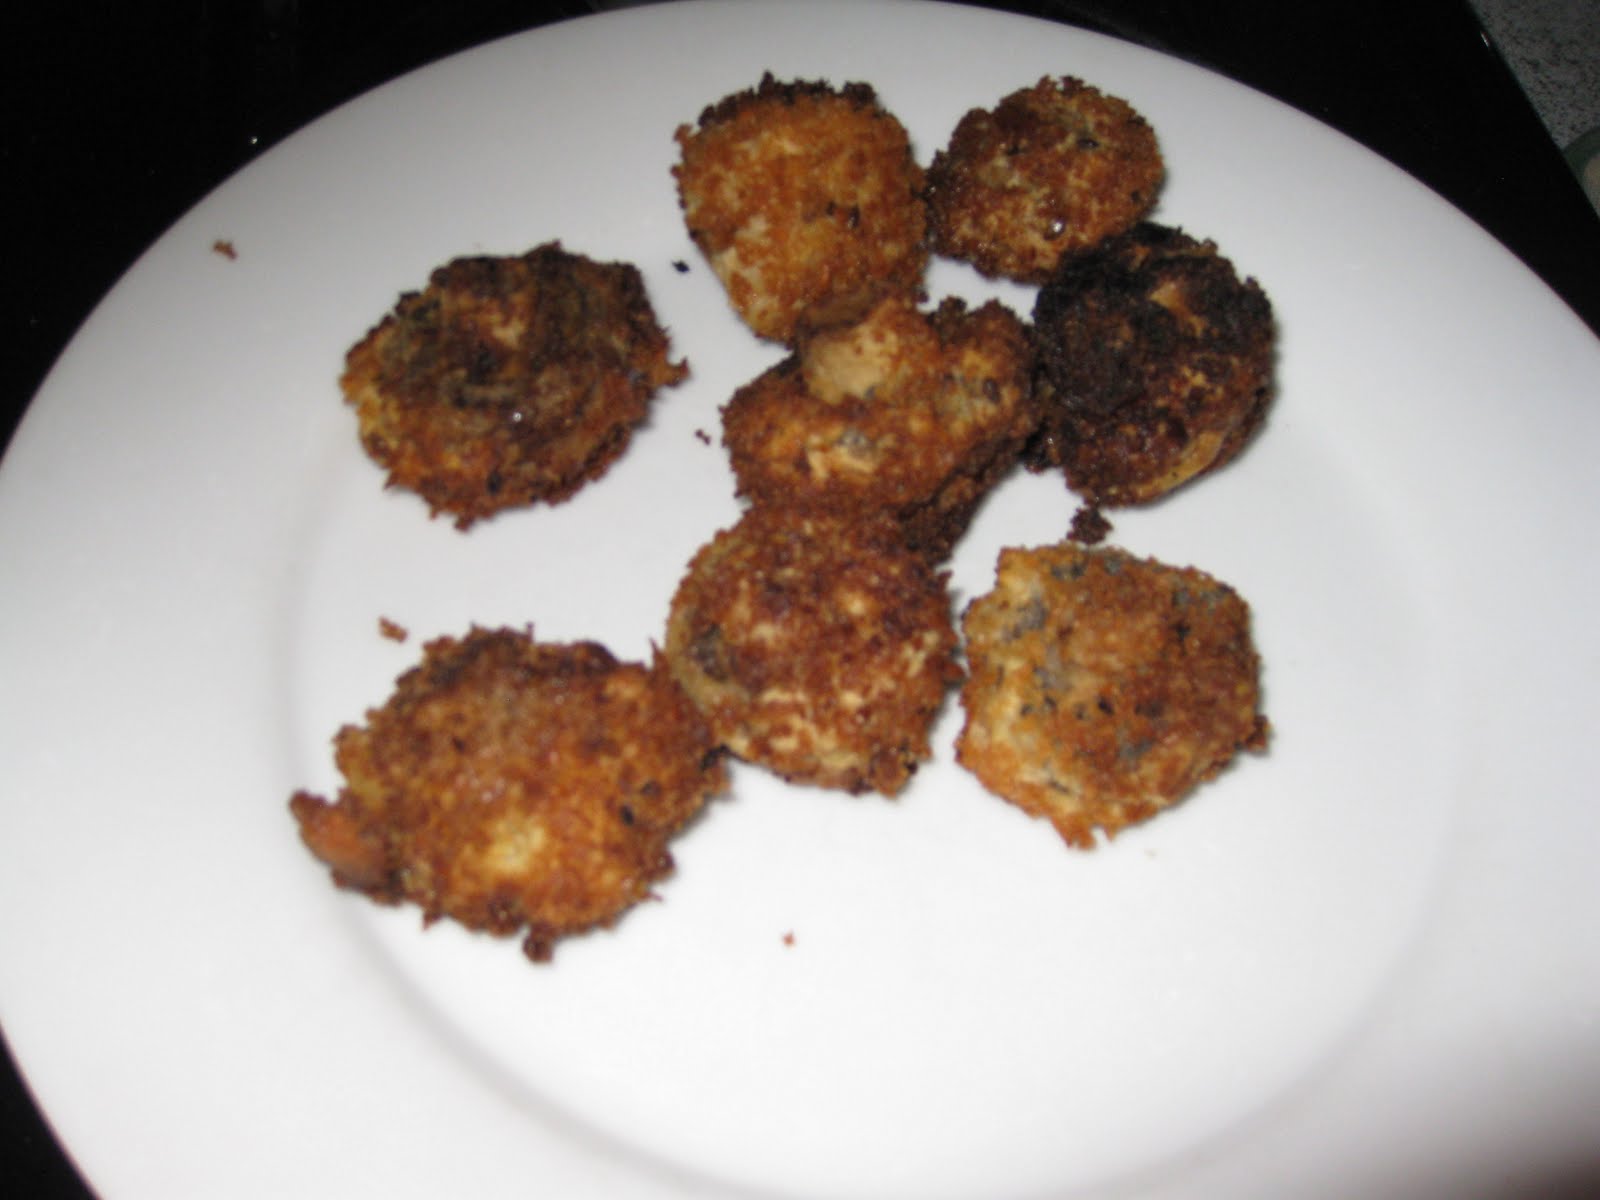
Deep Fried Mushrooms are one of those improbable seeming recipes that I never made because it never struck a chord. Or, as one of my family members says, quoting Monty Python, "No bell." They're okay. I probably wouldn't ever make them again, but I also won't give them the "YUCK" award for the worst thing ever found in a cookbook. If you like deep fried stuff, you'll probably like these. I made them on Monday night because I'm trying to make one thing per day out of this cookbook now that school is out.
I have tried to give attention to sections that I have ignored generally, like the Breads section, but I also have other things to do, or not to do, so today I landed on Deep Fried Mushrooms as something that I could check off at dinnertime. In the past I have not had huge success with deep fried items. Usually, the breading fell off or something like it. Knowing me, I probably didn't follow the directions, because if you follow the directions, the breading sticks admirably and fizzes up in the hot oil. They are good when served with tartar sauce, so do that, unless you find tartar sauce disgusting.
Deep-Fried Mushrooms
32 medium sized white mushrooms
flour
salt and freshly ground black pepper to taste
2 eggs
1 teaspoon water
1 teaspoon peanut oil or vegetable oil
1 1/2 cups soft bread crumbs
oil for deep frying
tartar sauce
1. Trim off the tips of the mushroom stems, but leave the stems on. Rinse the mushrooms under cold running water and drain. Do not dry.
2. Dredge the mushrooms in flour seasoned with salt and pepper. (This means dump the flour in a bag, put the salt and pepper in, and then dump the mushrooms in on top and shake them.)
3. Beat the eggs with the water and peanut or vegetable oil and place in a pie dish.
4. Toss or turn the mushrooms in the egg mixture until well coated. Coast the mushrooms on all sides with the breadcrumbs. Let stand until ready to cook.
5. Heat oil in a large skillet and when hot (375 degrees) add the mushrooms. Cook until golden brown all over. Drain on paper towels and serve hot with tartar sauce. Makes four servings.
Monday, June 27, 2011
Blueberry Shortcake
Since it is already blueberry season, at least down here, I made blueberry shortcake for the church potluck. Blueberry shortcake is pretty easy. I thought I had shortening, and did a search of the cupboards, unearthing artichoke hearts, instant noodle bowls, canned plums, and all manner of odd foods. But, no shortening. So, I used butter.
If you plan on making biscuits or shortcake or any of that stuff, you should have a pastry blender. A pastry blender is in the shape of a crescent, with a handle on top. It has multiple crescent shaped knives to allow the cook to cut in the butter or shortening. If you keep scraping the butter or shortening off the pastry blender and using the knives to work the dough back and forth, you will end up with a mixture that resembles oatmeal, or so says the cookbook. It's true. The flour sticks to little bits of shortening, or butter, and looks kind of like oatmeal.
This desert is reasonably quick and does not require much attention.
Blueberry Shortcake
Shortcake
2 cups flour
3 teaspoons baking powder
1 teaspoon salt
3 tablespoons sugar
1/2 cup shortening or butter
2/3 cup milk
2 tablespoons butter
Sauce
1/2 cup sugar
2 teaspoons cornstarch
1/8 teaspoon salt'
1/2 cup water
2 pints blueberries
1 tablespoon lemon juice
1 teaspoon grated lemon rind
1 cup heavy cream whipped
1. Preheat the oven to 450 degrees.
2. To prepare shortcake, sift the flour, baking powder, salt and sugar into a bowl. Cut in the shortening until mixture resembles oatmeal.
3. With a fork, blend in the milk until mixture is just moistened. Knead lightly twenty seconds and turn onto a lightly floured board. Pat or roll into a large round one-half inch thick roll.
4, Place dough on a greased sheet and bake twenty minutes or until done. Split and spread with the butter.
5. While shortcake bakes, prepare sauce by mixing sugar, cornstarch and salt together in a small pan. Stir in the water and one pinto the the blueberries. Bring to a boil and simmer until clear and thickened, about four minutes. Remove from heat and add the lemon juice and lemon rind. Cool.
6. Spoon sauce and remaining pint blueberries between and one top of shortcake layers. Decorate with the whipped cream. Makes six servings.
Fish Stew

Here I am back with the fish again. On Saturday evening, we had a group from my husband's church to dinner. Usually, the way these things are supposed to work is, one person brings the hors d'oeuvres, one person brings a starch, one person brings a vegetable, a fourth person brings the salad, and a fifth the desert. The host generally provides the main course. Well, the group was somewhat smaller than usual. We provided hors d'oeuvres, main course and desert. Hors d'oeuvres were just "dip" spread on french bread.
It was a very congenial group. People have had all kinds of experiences. One gentleman spent a good part of the 1950s in Berlin courtesy of the U.S. State Department. Since they are all church people, there was a lot of conversation about the bishop of Alabama, or possibly Mississippi, who incidentally was a woman. I bet those Southerners hated that.
Since we have been employing a cleaning company for about the last month, the house was actually clean. Far from spending the whole day cooking and cleaning, we rode the red city bikes down to Dupont Circle and went to an exhibition at the Phillips Gallery. We wanted to ride them back home, but alas there were none. We got one from the rack on Massachusetts Avenue and walked off in search of another, not to find one. We ended up sticking our one bike on a rack on Florida Avenue and taking the bus home.
The stew was very good. Garlic lovers note it has three, count 'em, three cloves of garlic in it, a major breakthrough for the 1960s. I actually used the three ripe tomatoes, as instructed, instead of opening a can of tomatoes. Worked well. We ate the rest of it for dinner on Monday night. As for the clams, I cooked them separately, in a small pan with a tablespoonful of water in it. Note to the wise. If you want to cook clams this way, watch them. When I came back into the kitchen, the bottom of the pan was black. The clams, which were still in their shells, seemed okay, but probably drier than they should have been.
Fish Stew
3 cloves garlic, finely minced
3 shallots, finely minced
1/2 cup olive oil
1/2 teaspoon chopped thyme
1/4 cup chopped parsley
1 bay leaf
1 1/2 cups dry white wine
3 ripe tomatoes, peeled, cored and coarsley chopped ( I didn't bother with the peeling.)
salt and freshly ground black pepper to taste
1 large or two small cleaned squid
1 1/2 pounds cod fillets
1 1/2 pounds striped bass fillets
12 littleneck clams, scrubbed and rinsed under cold water
1. In a Dutch oven, cook the garlic and shallots in the oil briefly without browning. Add the thyme, parsley, bay leaf and wine and bring to a boil. Simmer, partially covered, about ten minutes. Add the tomatoes, salt and pepper and simmer ten minutes longer, stirring occasionally.
Lay the squid lengthwise on the sauce, then add the cod and bass fillets. Sprinkle with salt and pepper. Cover and simmer ten minutes. Add the clams and cover. Simmer just until the clams open and give up their juices. Serve piping hot. Six servings.
Friday, June 24, 2011
Potato Bread

Potato bread, like many of the recipes in this cookbook, dates from America's agricultural past. The cook has too much of something because of nature's bounty. What to do with all these blinking potatoes? Well, let's try putting them in bread. Maybe that will be good. And it is.
Nowadays, it's kind of weird to make some of these recipes. Because I had gotten particularly behind in my cooking, I actually mashed potatoes just to make the bread. I wasn't virtuously using up a leftover. But, I have to say, Potato bread is excellent.
As I mentioned when writing about Anadama Bread, I don't eat too much white bread. In fact, I don't eat it at all unless it's French. But this, undeniably white bread, is delicious. It makes excellent toast, and I have been eating it for breakfast all week. I fear that the yeast did not rise as required. I produced two, very dense loaves. There are air holes. I didn't kill the yeast, but the loaf is much more compact than usual. Perhaps making it in an air conditioned kitchen does not provide the right environment for the yeast to flourish. I don't know. Try waiting to make it until the temperature goes below 80 and you can open the windows.
The baker uses the phrase, "a manageable dough." What this means is, when you first start adding flour, you will get a big, sticky mass. As you gradually, and gradually is important, add more flour, half a cup at a time, it will be less sticky and liquidy and form into a semi squishy semi solid mass. If you can pick it up without having it ooze through your fingers, that is a manageable dough.
Once this happens, start adding the flour a couple of tablespoonsful at a time. Then knead it according to any of the bread kneading videos on the Internet. As it starts sticking to your hands more, add a couple of tablespoonsful of flour, and keep kneading. Repeat the process until it stops sticking to your hands. It's actually pretty easy when you get the hang of it.
Potato Bread
1 package active dry yeast
1/2 cup lukewarm water
1 cup milk scalded
2/3 cup sugar
1 teaspoon salt
2 eggs lightly beaten
1/2 cup mashed potatoes
6 cups flour, approximately
1. Dissolve the yeast in the water. Combine the milk, sugar and salt and let stand until lukewarm.
2. Beat the eggs into the mashed potatoes and gradually beat in the cooled milk mixture. Add the dissolved yeast.
3. Stir in enough flour to make a manageable dough. Turn onto a lightly floured board, or your granite or Corian countertop, and knead until smooth, about ten minutes. Place in a clean, greased bowl, cover and let rise until doubled in bulk, about one hour.
4. Knock dough down and shape into two loaves. Place in two greased 9-by-5-by-3-inch loaf pans. Cover with a damp cloth and let rise in a warm place until doubled in bulk.
5. Preheat the oven to 375 degrees.
6. Bake forty minutes or until done.
Makes two loaves.
Thursday, June 23, 2011
Reuben Sandwich

Sometimes you wonder about people. Namely, right now, the leadership and membership of the Republican Party, and the kind of person who would publish a recipe for Reuben sandwiches without Russian dressing. I mean, what the hell? This is not a case of tastes changing in intervening years. Even a little country girl (or to be strictly accurate, a big country girl, at age 15 who stood 5 feet, 11 inches and weighed 180 pounds) like me knew that Reuben sandwiches contained Russian dressing. I discovered them in 1968 at the deli on 42nd Street across Fifth Avenue in front of the New York Public Library.
When I came to Washington later that year, I ate Reuben sandwiches at the New York Style deli on G Street down from the World Bank, and they had Russian dressing on them too. So put the Russian dressing on, please.
This recipe is the start from scratch kind, and makes ten to 12 sandwiches. One can buy sliced corned beef at the deli section and make one or two sandwiches. Not omitting the Russian dressing, of course.
Another thing that makes this recipe distinctly inferior. Reuben sandwiches should not be made on toast. They should be cooked in a frying pan or in a waffle iron so the cheese melts properly and the crust is buttery. So disregard all that info about toast.
Reuben Sandwich
3 pounds corned beef
1 one-pound-11-ounce can sauerkraut
20 to 24 slices rye bread with caraway seeds
butter
1 pound sliced imported Swiss cheese
1. Place the corned beef in a deep kettle or casserole and cover with cold water. Bring to a boil, cover and simmer gently about fifty minutes a pound, or until tender. Thirty minutes before cooking is scheduled to be finished, pile the sauerkraut on top of the meat.
2. Slice the corned beef and drain the sauerkraut.
3. For each sandwich, toast two slices of rye bread. Butter each slice on one side. Place one piece buttered side up, top with several slices of hot corned beef, and spoon hot drained sauerkraut over corned beef. Arrange slices of Swiss cheese over the sauerkraut and broil until the cheese melts. Top with remaining pieces of toast (and Russian dressing) butter side down. Makes ten to 12 sandwiches.
Note: If you don't have Russian dressing, or don't want Russian dressing for anything but these sandwiches, you can make your own. Combine 1/4 cup ketchup, 1/4 cup mayonnaise, a tablespoon of pickle relish, and a teaspoon of chili powder and mix it up. Voila, Russian dressing.
Wednesday, June 22, 2011
Pennsylvania Dutch Cabbage
I like cabbage as much as the next person. Cabbage is underrated, actually, in the vast pantheon of vegetables. However, I held off on this recipe for years because of one thing, the three tablespoons of flour. What I think the flour would do, because I don't really know, is form some sort of a white sauce. It would be a white sauce without milk or butter. It somehow doesn't sound very good. So I left it out. My son the lawyer would not approve of this, but, so, sue me. I'm not into making things merely to throw away if they do turn out as badly as feared. This was dinner, and who wants pasty tasting cabbage? If somebody else wants to try this and let us all know, be my guest. Please, give my poor cousin Cricket a break and make a comment.
Without the flour the vinegar and sugar produced a sort of not unpleasant, sweet and sour cabbage. It went well with whatever we had for dinner. (I can't remember.)
Pennsylvania Dutch Cabbage
1 large head cabbage, coarsely shredded
1/2 cup cider vinegar
2 tablespoons sugar
3 tablespoons flour
1. Place the cabbage in a large kettle. Combine the vinegar, sugar and one quart water and pour over the cabbage. Bring to a boil and boil vigorously, uncovered, twenty-five to thirty minutes.
2. Mix the flour with a little cold water and stir into the hot cabbage. Cook, stirring until mixture thickens. Makes eight servings.
Anadama Bread

I have been a demon bread maker for years, 27 to be exact. When I was staying home with my son, I decided making bread was a good way to save money. Most of the bread recipes in the cookbook were made in 1984, 1985 at the latest. I kept it up pretty faithfully until sometime this winter, when I got bored with putting the bread in to bake at 11:30 at night and having to stay up for an hour so I could run down and turn the timer off. Otherwise it beeped frantically all night, which didn't bother me but drove my husband and the old Corgi dog crazy.
This week I decided to rededicate myself to the cookbook. The dinner party had given the month a quasi respectable total, but I could do better. Plus, bread was $4.95 at Safeway, which seemed like a ridiculous price. I made Anadama Bread because we needed bread.
Anadama Bread is a traditional New England bread that was thought to originate in Rockport Mass. A restaurant called the Blacksmith Shop opened a bakery in 1956 and sold Anadama Bread all over New England. Pepperidge Farm used to make Anadama Bread, and may still, for all I know. I remember as a child, I didn't like it. I was firmly convinced all bread should be white. That was before the late 60s and early 70s when white bread was revealed to be poison, causing bowel cancer, draining the national vitality and in general bad stuff. I turned to whole wheat bread overnight.
After 40 years of eating and making whole wheat bread and I guess what might be termed whole grain bread (if you don't have enough whole wheat or white flour, throw in whatever you do have, which in my case was usually oatmeal or cornmeal.) Anadama bread tasted pretty normal. The recipe makes two nice, fine grained loaves.
For those who would undertake this, be warned. It is not difficult, but it does take time. I started it around 1:00 and took it out of the oven at 8:00 pm. It has to rise no less than three times. You just have to time things. Start it on Saturday morning before you go to your yoga class. Beat it down when you return for lunch. Let it rise 45 more minutes and then take care of the rest of it.
About the kneading. The instructions are not very helpful for a novice. "Add flour gradually stirring in just enough to make a stiff dough. " What is a stiff dough? How gradually? Answer number two, very gradually. Add the flour half a cup at a time. If you put in too much, you end up with a stiff intractible mass. I will translate as the recipe moves along. To see kneading at work, click on the You Tube symbol. Also, Anadama Bread is made with corn meal, which is very crumbly. Lest your bread be crumbly and fall apart, you have to knead it until it becomes smooth.
Anadama Bread
1/2 cup yellow corn meal, preferably waterground
2 cups boiling water
2 tablespoons shortening
1/2 cup dark molasses
1 tablespoon salt
2 packages active dry yeast
1/2 cup warm water
7 to eight cups sifted flour
melted butter
1. Add the corn meal to the boiling water, stirring constantly. Add the shortening, molasses and salt and let cool to lukewarm.
2. Soften the yeast in the warm water and stir into the corn meal mixture. Add the flour gradually (1/2 cup at a time.) stirring in just enough to make a stiff dough. (A stiff dough is kind of hard. You don't want it to be soupy. The dough should pull away from the sides of the bowl and form into a lump.) Knead well (for about 1o minutes, or until the dough stops sticking to your hand. Place in a bowl rubbed with shortening or butter. Cover with a cloth and let stand in a warm place. (You don't have to turn off the air conditioning.)
3. Slash through dough with a knife or punch dough with the fingers. Cover and let rise in a warm place forty-five minutes longer. Pull out onto a lightly floured board and knead well, adding more flour if necessary. (It will be necessary. Sprinkle the flour onto the dough a couple of tablespoons at a time, like the baker in the video. More flour keeps the dough from being sticky.)
4. Shape the dough into two loaves. (You do this by digging out half the dough with your fingers and then rolling the piece between your palms until it assumes the proportions of a longish, fattish sausage. Then tuck the ends under and put it into the baking pan. Push the dough in the middle down so the ends are more or less level with the middle) and place in two 9-by-5-by-3 inch loaf pans rubbed with shortening or butter. Cover and let stand in a warm place until nearly doubled in bulk.
5. Prehead the oven to 400 degrees.
6. Bake the two loaves fifteen minutes and reduce the oven heat to 350 degrees. Bake about forty-five minutes longer. Brush the tops of the loaves with the melted butter and remove the bread from the oven to a rack.
To see the video, click here.
http://www.youtube.com/watch?v=dWj8oHMPFm0
Sunday, June 19, 2011
Herb's Crab-Stuffed Whole Flounder

As mentioned before, the fish section is taking a long time to get through. While I am not exactly well known to the Korean lady at the fish store, I come there every couple of months to spend money and plenty of it. Each of these fish recipes is a revelation. I had never cooked a flounder before. The phrase flat as a flounder has basis in fact. Flounders are in fact flat, like a fish shaped pancake. They're a weird breed of fish, but tasty. They are also bony, so be warned.
The recipe calls for individual flounders to serve each diner. The fish store had larger flounders. I bought three and stuffed them according to instructions. Anyone not able to buy individual flounders might cut back on the crabmeat. I must have had half a pound of crabmeat left over. On the other hand, due to my husband's well-known shellfish allergy (and apparently that of my co-mother-in-law) I didn't stuff one of the flounders. I still don't think I would have used the entire pound. The recipe says to wrap the flounders in aluminum foil using a "drugstore wrap." Sorry, cannot enlighten you on this one. Just seal the foil up tight.
This is not a difficult recipe to make if one is handy with a knife and able to follow directions. I am handy with a knife, but reading the recipe again, I realized that I was supposed to open the top part of the flounder up like a Kleenex box, so the crab stuffing was sitting on top of the fish. I cut the fish at the top and bottom (as though the fish was swimming) and put the stuffing in there. I probably would have used more stuffing if I had done it the right way.
The dinner received effusive praise from our old friends Barbara and Brian. They both sent me thankyou notes. Brian, being a lawyer, does not have copperplate handwriting. At first I thought he said I was a "monster cook" but after reading it again, I decided he had said "master cook."
Herb's Crab-Stuffed Whole Flounder
1/3 cup plus three-quarters cup butter
1/2 cup chopped onion
1/3 cup chopped celery
1/3 cup chopped green pepper
1 clove garlic finely chopped
2 cups soft bread crumbs
3 eggs lightly beaten
1 tablespoon chopped parsley
salt
1/2 teaspoon freshly ground black pepper
1 pound crab meat
6 whole flounder each weighing three-quarters pound to one pound
1/3 cup lemon juice
1. Preheat the oven to 350 degrees.
2. Melt one third cup of the butter in a skillet and sautee the oinion, celery, green pepper and garlic in it until tender.
3. Add the breadcrumbs, eggs, parsley, two teaspoons salt , the pepper and crab meat.
4. Wash and dry flounder and make a pocket for the stuffing by laying fish, light side down, on a board. Cut down the center of the fish along the backbone from tail to about one inch from the head end. Turn knife flat and loosen flesh from the backbone and ribs on each side, making two flaps.
5. Stuff fish loosely with crab meat mixture.
6. Melt remaiing butter and mix with the lemon juice and salt to taste.
7. Spread two tablespoons butter mixture on each of six 18 inch square pieces heavy duty aluminum foil. Place a fish on top and spoon another tablespoon butter mixture over fish. Close foil with tight drugstore wrap. Place in shallow baking pan and bake thirty minutes or until fish flakes easily. Serves six.
Poppy Seed Dressing
Hey! All you 21st Century food snobs! (Me included) Salad dressing with sugar in it is good. Not necessarily good for you, but tasty. I cut back on the sugar in this a little. If you follow the recipe, it contains 1/2 cup of sugar and 1/3 cup honey. Which is a lot of sweetener. I cut the sugar in half. What you have is a sweeter oil and vinegar dressing.
The note at the end of the recipe, which usually tells you where you might have been able to buy the ingredients should you have lived in New York City in the 1970s, this time said "Mrs. Linz uses the poppy seed dressing for orange, grapefruit and endive salad." Well, thought I, if it's good enough for the unknown Mrs. Linz of Connecticut, we ought to try it. So we had orange, grapefruit and endive salad which everyone seemed to like. Hey, hey, Mrs. Linz. Are you still out there in Connecticut?
There are various Internet recipes for orange, grapefruit and endive salad. I think we had two grapefruits and 4 oranges for 9 people, plus purple onion strips and, of course, endive. Just kind of do whatever you think best here.
Poppy Seed Dressing
1/2 cup sugar
1 teaspoon dry mustard
1 teaspoon paprika
1/4 teaspoon salt
5 tablespoons tarragon vinegar
1/3 cup honey
1 tablespoon lemon juice
2 tablespoons onion juice or finely grated onion
1 cup vegetable oil (not olive oil)
1 tablespoon poppy seeds
1. Mix together the sugar, mustard, paprika, salt and vinegar until sugar dissolves completely.
2. Add the honey, lemon juice and onion juice or onion. Gradually beat in the oil. Chill.
3. Add the poppy seeds just before serving. Makes about one and one half cups.
French Chocolate Cake

I finally had my Julie Powell moment. Julie Powell, foodies will remember, was the young woman who sought purpose in her life by setting a goal of making all the recipes in Julia Child's Mastering the Art of French Cooking in a year. Her efforts were reported in the movie Julie and Julia, with Meryl Streep. Ms. Powell was a perfectionist and spent a lot of time making and remaking dishes, throwing out the first batch because something in it did not turn out according to plan. I, on the other hand, am prone to say, what the hell, it will be okay and just blunder on with a curdled sauce or what have you.
To make French Chocolate Cake, I threw out, or more accurately, ate, not one, but two batches of what was supposed to be melted chocolate. Instead, it congealed into something like fudge. After the second batch, I was going crazy. I had melted chocolate zillions of times before, and it had never done this.
Well, this was a clear case of Hewitt not having tested the recipe. The first step in the original recipe, which will not be included in this recipe is, "Melt the chocolate gently with the water (one tablespoon) in the top of a double boiler over hot, not boiling, water." The first time, on Friday night, I melted the chocolate ever so carefully, making sure the water didn't boil. When it was almost melted, I poured in the tablespoon of water. Glunk. Shiny, mostly liquid chocolate instantly transformed into an intractable mass resembling metamorphic rock. It became clear after 10 more minutes that no amount of heat would melt this mess.
Saturday afternoon, after lunch, and after eating nearly a pound of the first attempt at melted chocolate I started again. My husband theorized that the problem was, I had added the water to the mostly melted chocolate. He said I should have put the water into the bowl with the chocolate and then applied heat. So, the second time I carefully put a tablespoon of water into the bowl with the new chocolate and applied heat. Same result. Chocolate piled up in the bowl like a brown iceberg. I was starting to get worried. People were coming to dinner at 7:00 and I still had to make the cake and the main course.
"Call Williams Sonoma," my husband said. "Ask them if they have the chocolate that the book says you should use." I had been using Giradelli Baking Milk Chocolate because Whole Foods didn't have Maillard's Eagle sweet chocolate.
For once, I took his advice. A very nice saleslady informed me that while Williams Sonoma did not have Maillard's Eagle sweet chocolate, the kind prescribed in the recipe, they did have Guittard, which was just as good. "I'll be right over," I promised, and hung up.
When I arrived at Williams Sonoma, I located both the chocolate and the salesperson I had spoken to. I started recounting my chocolate troubles.
"Oh," said the saleslady. "If you add water to chocolate it will seize up. Chocolate should be melted in an absolutely dry bowl. " Oh, I said. But, the recipe said...
She shook her head. "If you are concerned about the moisture content of the cake, you can add a tablespoon of water to the eggs while you beat them. "
"Ohhhh," I said. I trotted gamely back home with my pound of Guittard milk chocolate ($12. the pound) specially formulated in discs for better melting, put it in an absolutely dry bowl at low heat and left it strictly alone for about half an hour while it melted without congealing. Then I made the cake, stirring my tablespoon of water into the eggs, as directed by Williams Sonoma, who clearly knew more about it than the editor of The New York Times Heritage Cookbook, God bless her.
Now this is one of these cases of not exactly knowing how the recipe is supposed to turn out. What turned out was a very dense cake that didn't seem exactly cooked. I am sure that if I had inserted a skewer into the cake, it would not have come out clean. (Traditional recipes for cakes instruct the cook to stick a skewer into the cake to test for doneness. If the skewer comes out clean, it's done.) But, probably it wasn't supposed to. It was very good.
French Chocolate Cake
1 pound Maillard's Eagle sweet chocolate (or Guittard's milk chocolate)
1 tablespoon water
1 tablespoon flour
1 tablespoon sugar
10 tablespoons soft butter
4 eggs, separated
sweetened whipped cream
waxed paper
1. Preheat the oven to 425 degrees.
2. Melt the chocolate gently in the top of a double boiler over hot, not boiling water. This is a critical step in the preparation and should be done very slowly.
3. Remove from the heat and stir in the flour, sugar and butter. Beat the egg yoks lightly. Stir the tablespoon of water into the egg yolks. Gradually whisk into the chocolate mixture.
4. Beat the egg whites until they hold a definite shape but are not dry and fold into the chocolate mixture. Overbeating or underbeating will ruin the cake. The beaten egg whites should be folded smoothly, quickly and easily into the chocolate mixture. (This is one of these "Cook until done" instructions. I don't know what to tell you. Just fold the egg whites in and don't worry about it.)
5. Pour into an eight-inch springform pan that has been lined with wax paper. Bake fifteen minutes. Turn off the oven heat. Open the oven door, leaving it ajar and allow the cake to cool completely in the oven.
6. If the center of the cake still feels soft (yes, it did) refrigerate an hour or two but cake is best served at room temperature. Decorate with whipped cream. Serve small pieces. The cake is rich. Makes ten servings.
Caviar Mousse

I had considered caviar mousse as an appetizer for the party we gave before the wedding, but was scared off by (a.) the unavailability of the quantities of caviar needed, (b.) the expense. I went back to it as one of the few remaining appetizer recipes that my husband could actually eat. We had a dinner party Saturday night after an old friend we had not seen in a while came by, and I invited her and her husband to dinner. I solved the expense part by using red caviar which is cheaper, but still pretty expensive, and getting my husband to pick it up on his way home from work. I was supposed to solve the quantities problem by cutting the recipe in half, which would have suited admirably, since there were nine of us at dinner, and half the recipe served nine.
However, after I told my husband to buy half as much caviar as the recipe called for, I went ahead and made the full recipe, with only half the caviar. Call it a case of brain blackout. So there was less caviar in the mousse. It was still a good appetizer, a jelled creamy mix of sour cream and mayonnaise, with the fish eggs exploding their salty fishy goodness in the mouth. Red caviar gave the mousse a mild pink tinge. Half the guests loved it. The other half took one bite and left the rest in its ramikin. I wonder if people ever say, "I don't want to go to dinner at their house. All they ever have is fish. I hate fish." The fish section is taking a long time to get through, that's for sure.
Caviar Mousse
3 envelopes unflavored gelatin
1/3 cup cold water
1 cup boiling water
1 teaspoon Worchestershire sauce
3 tablespoons lemon juice
1 teaspoon dry mustard
1/4 cup mayonnaise
6 cups sour cream
12 ounces caviar
toast rounds
1. Soften the gelatin in the cold water. Add the boiling water and stir to dissolve gelatin.
2. Add the Worcestershire sauce, lemon juice and mustard. Cool slightly.
3. Blend the mayonnaise and sour cream together. Stir in the caviar and then the gelatin mixture. Pour into a shallow serving dish or lightly oiled mold. Chill until firm. Unmold and serve with toast rounds. Makes 18 servings.
Wednesday, June 15, 2011
Maine Sardine Salad
As a food reviewer, I am a shockingly unadventurous cook and eater. Over and over again, in the course of writing this blog, I say, this was really good and I should have made it sooner, but it looked weird. Maine Sardine Salad is the same thing. If I had taken time to read beyond the title, I would have realized that this is Caesar Salad with sardines. The sardines add a mild fishiness to the taste, and what you end up with is a very acceptable salad, either as a salad, or as a main course.
Maine Sardine Salad
1 clove garlic, crushed or quartered (I chopped it up into tiny pieces,)
3/4 cup oil
1 1/2 cups small bread cubes
1 egg
1 small onion, sliced and sparated into rings
8 cups bite-size pieces romaine lettuce
1/2 teaspoon salt
1/4 teaspoon freshly ground black pepper
2 tablespoons lemon juice
1/3 cup freshly grated Parmesan cheeze
3 three-and three-quarter ounce to four-ounce cans sardines
6 cherry tomaroes, peeled
1. Let the garlic stand in the oil one hour or longer. Remove garlic and discard. (This is one of these 1950s garlic hating directions. ) (Forget about it.) Cut your garlic into tiny pieces and mix it into the salad.
2. Heat one-half cup of the oil in a skillet, add the bread cubes and cook until golden and crisp. Drain on paper towels. Set aside.
3. Place the egg in a saucepan, cover with water, bring to as simmer and simmer one minute. Drain. Set aside.
4. Place the onion, romaine, salt and pepper in a salad bowl. Pour remaining oil over all and toss lightly. Break the egg into the salad.
5. Add the lemon juice and toss thoroughly. Add the cheese, bread cubes and sardines. Toss. Garnish with the tomatoes. Makes six servings.
Monday, June 6, 2011
Marinated Maine Sardines
Wikipedia, which, by the way, should only be spelled with one k lest the researcher think that something has happened to the famous on-line encyclopedia site, is disappointingly quiet on the subject of sardines. They are pilchards, Wikipedia informs us, and the sardine canning industry in the U.S. peaked about 1950. The last large sardine cannery in the country, in Prospect Harbor, Maine, closed last year. They are named for the island of Sardinia
In any case, sardines, which used to be popular in the U.S. as a cheap sandwich filling, are no longer popular. I, who have reached the advanced age of 60, had never eaten a sardine until I decided to bite the bullet and make the two sardine recipes in the Northeast section of the NYTHCB.
First of all I was surprised at how large they were. I expected them to be about the size of anchovies. They are actually about the size of an adult's index finger in diameter, at least at their midsections, if sardines can be said to have midsections. They taper down to about the diameter of a child's index finger at their tail ends.
Second of all, I was surprised at what a tasty dish Marinated Maine Sardines turned out to be. My husband observed that the taste was similar to marinated herring, and it was. This is a lovely hot weather dish. You MUST make it ahead of time to give the flavors a chance to blend. For once, the Berkshire Farmer followed directions and made the dish 24 hours in advance. The sardines on a bed of lettuce make a great main course salad, or an appetizer.
Marinated Maine Sardines
3 three-and-three-quarter-ounces to four-ounce cans sardines
3/4 cup sour cream
1/4 cup light cream
1/4 cup tarragon vinegar
2 tablespoons lemon juice
2 tablespoons dry white wine
1 clove garlic crushed
1/2 teaspoon horseradish
1/2 teaspoon salt
1/2 cup onion thinly sliced, separated into rings
1 cup thinly sliced peeled cucumber
Boston lettuce cups
1. Day before, drain the sardines and arrange in a single layer in a shallow baking dish. Combine the sour cream, light cream, vinegar, lemon juice, wine, garlic, horseradish and salt.
2. Mix together cream mixture, the onion and cucumber and spread over sardines.
Chill overnight. Next day, arrange in lettuce cups. Makes six servings.
Subscribe to:
Posts (Atom)