Showing posts with label butter. Show all posts
Showing posts with label butter. Show all posts
Sunday, November 30, 2014
Orange Glazed Sweet Potatoes (Gluten Free)
It seems to be a Thanksgiving tradition to have two kinds of potatoes at our dinner, white mashed and sweet. I am actually not sure how this thing got started. It may have been when the kids were younger and requested mashed sweet potatoes topped with marshmallows, which, although schmaltzy, are really good. The cookbook continues to provide me with sweet potato recipes, so this is an opportunity to make them. My husband, Bob, does not care for sweet potatoes, so they do not usually appear at our table.
As sweet potato dishes go, this one is okay. Note that the sweet potatoes are supposed to be mostly cooked before you orange glaze them. (I didn't.) In fact, in a spectacular failure to read the recipe I neglected to buy orange juice when I went to the supermarket on Tuesday. So around 1:00 on Thursday, halfway through the four hour cooking marathon, I took Watson, the corgi, out to CVS to buy a bottle of orange juice. So, to make your Thanksgiving, or whatever, go more smoothly, be sure to buy orange juice and precook the sweet potatoes. Unless you want to get out of the kitchen for a few minutes and walk the dog.
The recipe author envisioned serving the potatoes whole. I sliced them, which seems like a better strategy when dealing with several side dishes. People may take what they want and leave the rest. I also only put in the brown sugar. It was plenty sweet.
Orange-Glazed Sweet Potatoes
6 medium sized yams or sweet potatoes, scrubbed and boiled or baked until barely tender and peeled. (Peel these first. If you cook them first, you risk burned fingers.)
1 cup orange juice
2 teaspoons grated orange rind
1 tablespoon cornstarch
3 tablespoons melted butter
1/3 cup light brown sugar
1/3 cup granulated sugar
1/8 teaspoon salt
1. Preheat the oven to 350 degrees.
2. Place the already cooked yams or sweet potatoes in greased shallow baking dish. Combine the remaining ingredients in a small pan an bring to a boil, stirring. Pour over the potatoes and bake thirty minutes, basting occasionally. Makes six servings.
Sunday, November 16, 2014
Sweet Potato Pone (Gluten Free)
Our son and daughter-in-law came to dinner Thursday night. I decided to make lasagna because we had enough lasagna noodles to make at least two pans of lasagna. Also, they like lasagna. Dessert was a close call. I was going to make apple crumble, which I had made in the distant past and so would not result in a post. Then I started paging through the cookbook and discovered this. Easy, tasty, and as it happens, leaving a half sweet potato to make sweet potato quesadillas.
After walking to the grocery store, which I do nowadays in order to get in fitbit steps, I began boiling water for the lasagna noodles and grating sweet potato. It has to bake for three hours, so, I got it in at 4:30.
By 6:30, we needed the oven for the lasagna. Bob examined the pone, which was still in a largely liquid state, and suggested we leave it in as we turned the oven up to 350 degrees for the pasta. That was what we did. It turned out soft and sweet. It would have been better if I had started it later, because it is a dish best served warm.
This is a good fall dessert. It has all the fall flavors, molasses, cinnamon, nutmeg, ginger. Put it in the oven and forget about it. (Don't forget to set the timer, however!)
Sweet Potato Pone
2 cups grated raw sweet potatoes
1 egg beaten
1/2 cup unsulphered molasses
3 tablespoons sugar
3 tablespoons melted butter
grated rind of one orange
2 cups milk
1/2 teaspoon grated fresh or ground ginger
1/2 teaspoon cinnamon
1/2 teaspoon nutmeg
1/2 teaspoon salt
heavy cream or ice cream
1. Preheat the oven to 275 degrees.
2. Combine all the ingredients and pour into a one and one half quart baking dish. Bake three hours. Serve warm with heavy cream or ice cream. Makes six servings.
Saturday, June 28, 2014
Shrimp Paste (Gluten Free)

Shrimp Paste is easy. Buy cooked shrimp, readily available in the supermarkets, run it through the food processor, mix it with soft butter (soft is key), onion juice, (I used minced onion, not knowing how to procure onion juice,) ketchup, Worcestershire sauce, lemon juice, etc, mold into a loaf pan and chill.
Verdict? It's kind of bland. There was a good deal left on plates, although Alex, the eight year old, ate his without complaining. The cook could jazz this up with liberal applications of Tabasco sauce, horseradish or possibly shrimp cocktail sauce instead of ketchup. If you want to use shrimp cocktail sauce, add it slowly and taste the result to make sure things don't get too spicy. However, if you are serving people who A. eat shellfish, but B. have timid little palates, this might be just the thing.
Shrimp Paste
2 pounds shrimp, cooked, shelled and deveined
6 tablespoons softened butter
3/4 cup ketchup
1 teaspoon onion juice, or one tablespoon minced onion
1 1/2 tablespoons Worcestershire sauce
Juice of one lemon
salt to taste
Tabasco sauce to taste
Lettuce
Mayonnaise
1. Put shrimp through a meat grinder twice, using the finest blade. Modern translation. Run it through the food processor twice.
2. Cream the butter using a fork, add shrimp and the remaining ingredients except lettuce and mayonnaise. Blend with a wooden spoon until mixture is the consistency of mayonnaise. Mold with hands into a loaf and press into a six-cup loaf pan. Refrigerate six hours. Unmold and slice in one-quarter inch slices. Serve on lettue with mayonnaise. Makes six to eight servings.
Grilled Pig in a Blanket

Pig in a Blanket is a pork loin wrapped with a sheet flank steak or round steak, sliced into rounds and grilled on the barbecue. My son would have loved it. I did not cook it for him and his wife, however, but for Mary and Bill, and Joe and Katherine, old friends of ours who came to dinner. Joe and Katherine brought their 8 year old son, Alex, who has had the good taste to grow up to be a baseball fan. He brought along his collection of baseball cards for me to admire.
This is an easy main course to prepare, except for the grilling. I always have issues with the barbecue. Like many Americans, I once assumed that more was better in the charcoal department. Just load on those briquettes and go to town. What you get in that case is charred, leather-like meat. Then, I became a Girl Scout leader. The Girl Scouts are the repositories of much terrific information, how to put up a tent, how to make a fire, how to grow into adulthood without becoming a teen queen, but for my money, the best piece of information is, that every charcoal briquette generates 25 degrees of heat. Of course, then, you have to give the meat time to grill.
So, in theory, one can precisely set the temperature of the grill by putting in the number of briquettes multiplied by 25 that results in the temperature at which you want to cook your food. So, if you want to "set" the grill at 350 degrees, you put in 14 briquettes, because 25 X 14 = 350. Well, that doesn't take into account the time taken up with drinking beer and chatting while the charcoal burns down, so your setting is somewhere around 200 degrees by the time you actually are ready to put the meat on. That is what happened to me. I took the top off the grill and was chagrined to find my 15 or so briquettes vastly reduced in size and covered with ash.
So, throwing Girl Scout training out the window, I crumpled some newspaper and put it on top of the smoldering briquettes and tossed another handful of briquettes on top of it. Don't try this at home, boys and girls. The newspaper flared up and sent charred fragments flying through the air, but it did ignite the new briquettes. When I finally took the meat out, it was probably somewhat more rare than indicated, but no one rejected it, or got sick in the intervening days.
The guests really liked Grilled Pig in a Blanket. If you want to make it, I advise putting in 15 to 20 briquettes, watching them closely to catch the moment when they are lit, but not burned down, and putting the meat on the grill at that point. Give yourself about 45 minutes to grill the meat, checking it at intervals. Don't get wrapped up in the conversation and forget to check. If you have a gas grill, just set it at 350 or 375 degrees. If you have a crew of meat eaters, it will be a popular dish.
Grilled Pig in a Blanket
1 length of pork tenderloin, about eleven inches long
1 thin sheet flank or round steak, about 7 by 11 inches (about three pounds)
olive oil
salt and freshly ground black pepper.
juice of one lemon
1/4 pound butter, melted
1/4 cup finely chopped parsley
mushrooms au beurre
1. If pork tenderloin is not available, trim out the eyes of six small pork chops. If the tenderloin is used, wrap it carefully in the steak. Skewer with six skewers equally spaced. Slice between the skewers to provide six servings. Or, if the chops are used, roll each piece of meat with a length of steak trimmed to fit.
2. Place the meat on a grill over hot coals. When seared on one side, turn and brush the top of each serving with oil. Sprinkle the seared side with salt and pepper.
3. When the meat is cooked through, transfer to a hot serving platter. Squeeze half the lemon juice over meat. Squeeze the remaining juice into the butter and stir in the parsley.
4. Spoon the hot butter sauce over the meat and serve immediately. Garnish with mushrooms au beurre. Serves six.
Saturday, March 15, 2014
Passover Cheese Blintzes
This is the last Passover recipe in the New England section of the cookbook, Apparently Hewlett didn't run into any Jews in other sections of the country when compiling her recipes. I made it for dessert when the young marrieds came over. Last year, when I was tackling Passover baking recipes, I was amazed and pleased by how good they were. I was expecting them to be heavy, but they were not at all. Having said this, this is not one of the better recipes, in my opinion.
First of all there were some issues producing the pancakes. I was delighted to learn the Matzoh cake meal was still good. It took me so long to find it last year that if I had had to run around looking for a fresh container, I never would have made this recipe.
Maybe one of you reading this, who has had more experience with blintzes than I have, could offer some suggestions. I made the batter and filling before we sat down to dinner, so I could pull off the dessert quickly. When I went to make the pancakes, the batter seemed too thick, so I added a half a cup of water.
The pancakes came out brittle. When I went to roll them up around the filling, they cracked. They stuck to the paper towel I turned them out on. Now, one reason might have been my interpretation of the instructions. It said, turn the pancake browned side up onto a towel. I interpreted that to mean paper towel. Bad interpretation. The other recipe for cheese blintzes, (June, 2013) which I neglected to read until this minute, said turn it out on a sheet of waxed paper. That worked out much better. So use waxed paper.
Also, the filling seemed sloppy and did not have much flavor. The other recipe said add vanilla to the filling. That turned out really well. I put in a couple of teaspoons of sugar and a full lemon's worth of grated lemon rind. I would suggest draining the cottage cheese so the filling doesn't ooze out.
Everyone was really nice about it, but the blintzes turned out like a train wreck. The pancake packages came apart and the filling oozed out. I couldn't really brown them because they didn't stay together. So, be warned. This takes a more experienced hand with blintzes than I have.
Passover Cheese Blintzes
Batter:
3 eggs
3/4 cup matzoh cake flour
1 1/2 cups water
1/2 teaspoon salt
Filling:
1 pound cottage cheese
1 egg
1/2 teaspoon salt
1 teaspoon sugar
butter
1. Beat together the eggs, flour and water to make a thin batter. Add the salt. Pour about three tablespoons batter onto a buttered griddle or skillet, spreading as thinly as possible by tilting the pan. Fry until brown and turn out, browned sided up, onto a towel (sheet of waxed paper.)
2. To prepare filling, combine the cottage cheese, egg, salt, and sugar. Spread one tablespoon of mixture on surface of each blintz. Tuck in the ends and roll up.
3. Brown the blintzes in butter and serve hot. Makes about ten.
Saturday, November 9, 2013
No-Fail Welsh Rabbit (Gluten-free)
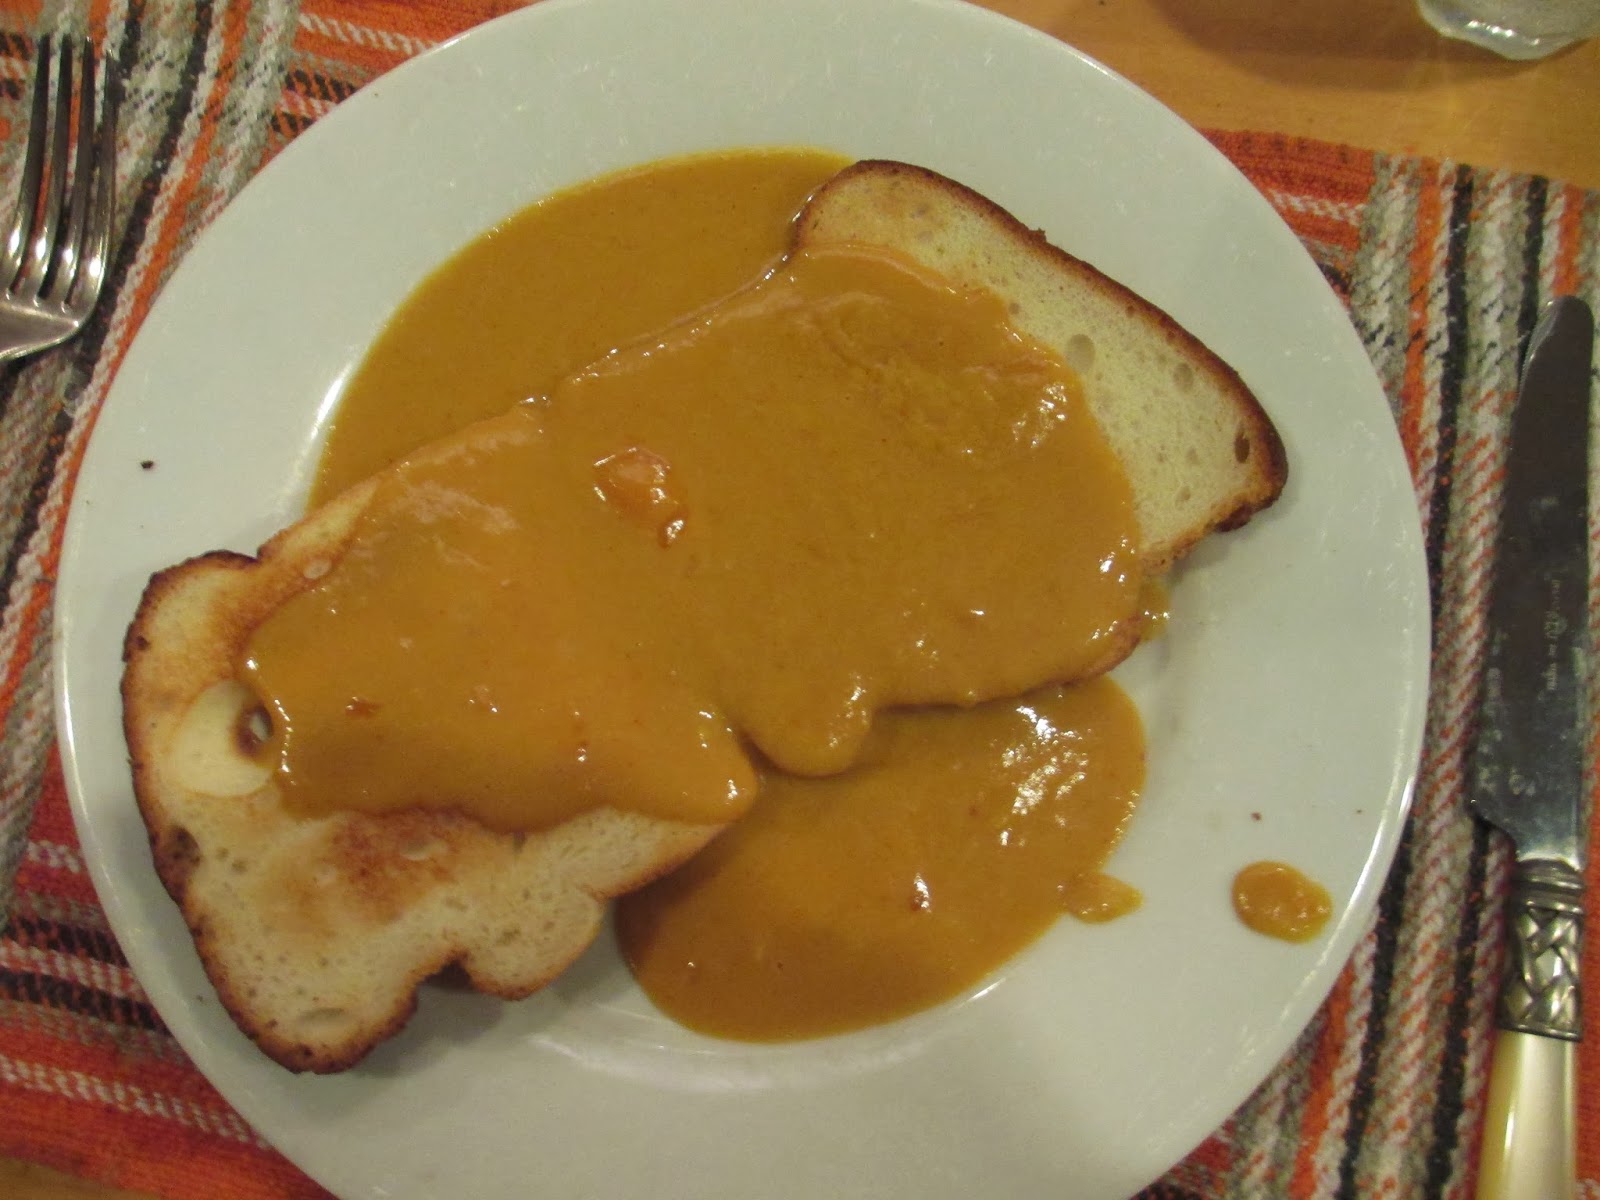
Welsh Rabbit was one of those magic foods I lusted after in my meat and two vegetables eating childhood. For some reason, it featured heavily in young people's books of the early 20th Century. Boys at boarding school induced their families to send them large wheels of cheese, which they used to make welsh rabbit during midnight feasts. I drooled over the descriptions of those midnight feasts, even though they usually involved some peculiar ingredient that took the place of the beer.
I can't remember the first time I ever had welsh rabbit, but I do remember making it in August, 1978, during the week I slept in my office in Centerville, a tiny town on the Eastern Shore of Maryland. I had gotten my first journalism job, and decided to save money by moving out of the boarding house in Easton, and crashing at the office. Luckily, the office was equipped with a kitchen and, I guess, a few pots and pans. Welsh rabbit is cheap, which might explain why there are no fewer than four rabbit-like recipes for cheese dishes in the Southern section of The New York Times Heritage Cookbook. Cheddar cheese seems like a New England product, but I guess none of the New England contributors thought to send in a recipe for what my mother's generation remembered as something their fathers used to make during the cook's night out.
I made the Welsh Rabbit on Thursday night after dog training class. We are trying to learn to control the puppy who is a lovely dog, but can be completely insane. The rabbit took all of five minutes, about half the time that Bob took to make the salad. The only thing you need to be careful about is stirring in the eggs. Do not overcook or the eggs will scramble, the recipe says. Keep it on a low heat, 4 on a gas stove, or less, and stir it.
No-Fail Welsh Rabbit (Gluten Free)
2 tablespoons butter
2 tablespoons flour ( I used gluten free flour. Rice flour works well too.)
1 cup stale beer
2 cups cubed sharp Cheddar Cheese
2 eggs well beaten
1/2 teaspoon dry mustard
1 tablespoon Worcestershire sauce or to taste
salt to taste
Cayenne pepper to taste
4 slices toast
1. Melt the butter and add the flour. Stir in the beer. When the mixture is thickened and smooth, add the cheese, stirring.
2. When the cheese is melted, add the eggs and cook just until the eggs thicken. Do not overcook or the eggs will scramble. Add the Worcestershire , salt and cayenne. Serve with or on toast. Makes four servings.
Sunday, November 3, 2013
Clam Souffle

Saturday night we served up two main courses. I made clam souffle and Bob made chicken piccata. Safeway was out of rice flour, so it was not gluten free. If you want gluten free clam souffle, use rice flour instead of wheat flour. We were cooking and cleaning at the same time, so I didn't get started on the souffle until just before the guests actually walked in the door. Really, that worked out fine, as souffles have to be made, baked and eaten with dispatch. You don't want them sitting around, as my son would say, festering.
I had the base, the butter, flour, clam juice and cream made before I bolted upstairs for a shower. It was supposed to cool slightly so that gave it the opportunity to do so.
Back downstairs, I separated the eggs. Note that this recipe makes two souffles and uses 12 eggs. It would be easy to cut it in half. When you are separating eggs and need a large quantity of egg whites, separate each egg into a small bowl, and add the egg white to the other egg whites. That way, you avoid contaminating eleven egg whites with a tiny bit of yolk from number twelve. If you do end up contaminating an egg white, you can add it to the four left over yolks for scrambled eggs the next morning.
Honestly, souffles are not particularly difficult if you possess a hand mixer. If you have never separated eggs, watch a you tube video and then practice with a dozen eggs. If you mess up, you can have scrambled eggs. Anyone can separate eggs with a little practice. Just don't be scared of the egg.
I beat the egg whites, folded them into the base and popped the souffles into the oven in their buttered dishes. The diners were full of complements. I found clam souffle somewhat bland. The clams don't have a great deal of taste, but that's just my opinion. If you like lightly flavored foods, go to it. You could also add things, like Parmesan cheese for extra flavor.
Clam Souffle
6 tablespoons butter
6 tablespoons flour
1 cup clam juice
1 cup heavy cream
1 1/2 cups minced canned clams
8 egg yolks
1/4 cup freshly chopped parsley
salt and freshly ground black pepper to taste
grated nutmeg to taste (about 1/2 teaspoon)
12 egg whites
1. Preheat the oven to 375 degrees.
2. melt the butter and blend in the flour. Mix the clam juice and cream and slowly add to the butter-flour mixture, stirring constantly. Cook, stirring, until thickened. (How thick? Kind of like cake batter, if that's any help.) Add the minced clams and remove from the heat to cool slightly.
3. Beat the egg yolks thoroughly and add to the sauce. Stir in the paresley and season with salt, pepper, and nutmeg.
4. Beat the egg whites until firm. Fold them thoroughly into the sauce. Pour into two buttered two-quart souffle dishes and bake thirty-five minutes. Makes ten to one dozen servings.
Tuesday, September 24, 2013
Cheese Grits Casserole

"I like to know what I'm eating," he said. Apparently, he doesn't always know what he's eating when he comes to our house.
Since the beans had to cook or set for hours, I started them around 2:00. About 5:00, it was time for the grits. I had had my eye on this recipe for several weeks, since I bought the grits for something else. I bought several iterations of sharp cheddar cheese that got eaten or made into some other dish. However, when I opened the cookbook, I couldn't find it. My eyes fell instead on a recipe for grits souffle. I started the grits with the intention of making the souffle. Immediately, I sensed a problem. The directions on the grits box tell you how to make various numbers of servings, not, how many cups of uncooked grits one needs to produce a certain number of cups of cooked grits.
Since time was passing, I winged it. I figured that if one cup of uncooked rice and two cups of water produce two cups of cooked rice, something like that would work for grits. It did. I put two cups of grits and four cups of water in the saucepan. Then I came to my senses . This dish had cheese in it, I said to myself. I looked in the index. I hadn't been able to find Cheese Grits Casserole because it was under main dishes at the end, with cheese concoctions.
I scraped the large amount of grits out of the sauce pan into a greased baking dish, mixed in everything but the beaten egg white and set it off to the side while I went to work on the fried chicken. I am not giving you the recipe because I made it once before, sometime in the 1980s. When the chicken was soaking in the milk, I went back to the grits. My husband Bob beat the egg white with a whisk. For some reason I had reached the state of malaise, or fatigue that made taking out the hand beater too much effort. The whole thing went into the oven and came out onto the plates of the delighted diners.
My son pronounced grits much better as a side dish than as a breakfast food. I have to say I agree. The first time I encountered them was on a ski trip for teenagers in Vermont. I thought it was cream of wheat and put milk and sugar on them. Cheese and butter makes virtually anything downright tasty.
Cheese Grits Casserole
5 cups water
1 cup hominy grits (I used regular grits. I prefer not to use quick cooking anything.)
1/2 pound sharp cheddar cheese, grated
1/2 cup butter
1 egg separated
1 teaspoon salt
1. Bring the water to a boil and gradually stir in the grits. Simmer, covered, twenty five to thirty minutes, stirring often.
2. Stir in the cheese and butter until melted. Spoon a little of the hot mixture not the egg yolk, return to the bulk of the mixture, add the salt and mix. Cool to room temperature.
3 Preheat the oven to 350 degrees.
4. Beat the egg white until stiff but not dry and fold into the cooled mixture. Spoon mixture into a greased baking dish and bake, covered, forty minutes. Remove cover, turn oven heat to 375 degrees and bake until top of casserole is slightly browned.
Makes six servings.
Sunday, September 22, 2013
Blueberry Upside-Down Squares

I finally found this, which I highly recommend. Go out to the store right now and buy the last of the highly expensive blueberries. It's a snap, and extremely tasty.
Hmm. While reading the recipe over in order to write this, I just discovered why it was so tasty. The recipe calls for 1/2 a cup of brown sugar and 1 tablespoon of butter. My eyes ran the two lines together, and I thought it said half a cup of butter. A tablespoon is just fine. However, I would advise upping the amount of grated orange peel. I needed two oranges to obtain the required 1/3 of a cup of orange juice, so I grated both the oranges and obtained two to three teaspoons of grated peel. It gave a nice tang to the pastry.
The finished product has a blueberry glaze on top, (if you are successful in inverting it over a plate and getting it to plop down neatly on said plate) and a sort of crispy shortbread on the bottom. I made the squares ahead of time. When I came to get them out of the pan, there was some resistance, so I just left them in there and served them with a mound of whipped cream on top. With all the whipped cream, it really didn't matter what was on top because the diners couldn't see it. Everyone seemed to like the squares, so I hope you will too. Let me know if you make them.
By the way, in my neck of the woods (Washington, DC) blueberries are now being sold in small containers, the size of a container of raspberries. One of these containers seems to hold about one cup of blueberries. I don't think you need to buy two containers (at $4 a clip) to get the proper effect. One will do, in my humble opinion.
Blueberry Upside-Down Squares
1 1/2 cups blueberries
1/2 cup light brown sugar
1 tablespoon butter
1/4 cup shortening
1/2 cup granulated sugar
1 egg beaten
1 teaspoon (or more) grated orange rind
1 1/4 cups cake flour
1/4 teaspoon salt
1 1/2 teaspoons baking powder
1/3 cup orange juice
whipped cream
1. Preheat the oven to 350 degrees.
2. Combine the blueberries, brown sugar and butter in a saucepan. Bring to a boil and simmer five minutes. Turn into a greased eight-inch square baking pan.
3. Cream the shortening and granulated sugar together until light and fluffy. Beat in the egg and orange rind.
4. Sift together the flour, salt and baking powder and add to batter alternately with the orange juice. Spoon batter over berries. Bake forty-five minutes or until done. Invert onto a plate. Cut into squares and serve warm, with whipped cream. Makes six servings.
Cape Cod Lobster Soup
With Cape Cod Lobster Soup, I am officially finished with the lobster recipes. Unless someone in my dear family requests lobster for a birthday dinner or other celebration, I won't be cooking them again anytime soon. I like lobster well enough. We don't tend to go to places where they serve it, but I would eat it. What I don't like is killing the things. Lobsters are slow diers. In terms of drama and flailing about, they could give Richard Burton int the role of Hamlet a run for his money. In this recipe, the cook is supposed to leave the lobster in a shell and let the diners dig it out. So, if you followed those directions, you would have pieces of lobster shell floating around in hot milk. I used poultry shears and dug out the lobster meat. Doing that made it seem unnecessary to buy a third lobster to get the cup of cubed lobster meat.
Lobsters, although they are supposedly in plentiful supply in the bays of Maine, are expensive. My local purveyor of what Bertie Wooster would call the finny denizens had not lowered the prices any. I just hope some of this money is going to the lobster man.
Another ingredient in the soup is pilot crackers. These are not sold in stores. If you want them, you can order them on the Internet from survivalist stores like. www.pioneerliving.net . Survivalists like them because they have a shelf life of 25 years. One could also use oyster crackers. I would say two cups of oyster crackers equals three large ships' biscuits or pilot crackers. I used Kebler crackers. They worked fine.
I served the soup at a dinner party on Saturday night, where four old friends and shellfish lovers came to talk about what people our age talk about, our trips, our kids, how messed up our past employers are, and the fact that NPR seems to have fired all their editors. The lobster soup was a hit. If you decide to serve it, take the lobster out of the shell. It's unfair to make the diners work so hard for soup. I discarded the tomalley and coral, aka lobster guts.
Cape Cod Lobster Soup
2 one-pound to one-and-one-half-pound live lobsters
5 tablespoons butter
3 large ships biscuits or pilot crackers
4 cups milk, scalded
salt and freshly ground black pepper to taste
1 cup diced cooked lobster meat
1. Plunge a knife into the thorax of the lobsters where body and head join, to kill them. Discard head and thorax, but retain tomalley and coral. With a cleaver or large chef's knife, cut tail and claws into small sections.
2. Heat two tablespoons of the butter in a heavy saute pan. Add lobster sections and cook, stirring, until pieces turn pink.
3. Crush the biscuits or crackers and mix to a paste with remaining butter. Mix in the milk and pour over the lobsters in the pan. Season with salt and pepper. Bring to a boil, stirring. Grate in the coral and add tomalley.
4. Add the cooked lobster meat and serve. Makes four servings.
Subscribe to:
Posts (Atom)