I made salsa cruda on Wednesday night when Bob made an extremely delicious pork taco dish out of a single pork chop. This is definitely a recipe enhanced by the existence of the Cuisinart. Saves all that fine chopping. It took all of five minutes. Do not, by the way, put whole vegetables into the Cuisinart. Chop them roughly, even the garlic clove.
I used jalapeno peppers from our garden instead of the canned chilies. I also suggest a whole teaspoon of ground coriander and a large pinch, maybe a teaspoon worth of pinch of oregano.
One must be judicious in the use of the Cuisinart. Don't buzz too much, or you wind up with soup. I was trying for a more textured salsa. It worked out well.
The editors of this cookbook, if they existed at all, translated Salsa Cruda into Cold Crude Sauce. Cruda means raw, dimwits. Couldn't you have gotten a Spanish English dictionary and learned that for yourselves?
Salsa Cruda
1 onion, finely minced (See introduction.)
1 clove garlic, finely minced
2 ripe tomatoes, or two cups Italian plum tomatoes chopped
1 four ounce can whole medium-hot green chilies, chopped
or 1 jalapeno pepper, roughly chopped
1/2 teaspoon ground coriander
pinch of oregano
salt to taste
cider vinegar or olive oil to taste
Combine all ingredients and refrigerate until ready to use serve with meat or poultry, or do as they do in Guadalajara and spread it on a tortilla, roll up the tortilla and eat as a snack or something to round out the meal. Makes about three cups.
Saturday, November 29, 2014
Mincemeat Pumpkin Pie
A week or so before Thanksgiving, I was leafing through the cookbook, and discovered, lo and behold, that I had actually not made all the pumpkin pie recipes. There was this little gem, from Oregon, lurking in the back of the book. Not only that, but I had, sitting in the back of my refrigerator, a jar of homemade mincemeat, left over from last year's mincemeat marathon. So, since my husband Bob specifically requested pumpkin pie here was a way of knocking off a recipe.
It is an incredibly easy recipe as well. You dump the mincemeat in the bottom of the premade pie shell, mix up the rest of the ingredients, pour and bake. I was able to made the pie on Monday evening and place it on the table on the day after the turkey marathon. This can backfire. I made the pecan pie Friday night. We were going out, and the pie wasn't done so I set the oven timer for 15 minutes and went out the door..
When we got back at 9:30, a "very thoroughly cooked pie" was sitting on the stove. We investigated it later in the weekend and found it to be cement-like in texture, so I made another one and watched the oven myself.
Bob found the pie under seasoned. If you like a more spicy pumpkin pie, you could double the cinnamon, and add 1/4 teaspoon ground cloves. Unfortunately, it did not seem to be to every one's taste. We found a couple of half eaten pieces in the living room, as well as a plate containing all the mincemeat, carefully picked out. I ate it Friday night at leftovers fest. Seemed fine to me. Well, it might be an acquired taste.
Mincemeat-Pumpkin Pie
1 1/2 cups mincemeat
1 unbaked nine-inch pie shell, chilled
1 cup mashed cooked (canned) pumpkin
1/2 cup sugar
1/2 teaspoon cinnamon
2 eggs lightly beaten
1/4 teaspoon salt
1/4 teaspoon nutmeg
1/2 cup milk
1. Preheat the oven to 425 degrees.
2. Place the mincemeat in the bottom of the pie shell.
3. Using a rotary beater, combine the remaining ingredients. Pour over mincemeat. Bake thirty-five to forty minutes or until set. Serve slightly warm or at room temperature.
Makes six servings.
It is an incredibly easy recipe as well. You dump the mincemeat in the bottom of the premade pie shell, mix up the rest of the ingredients, pour and bake. I was able to made the pie on Monday evening and place it on the table on the day after the turkey marathon. This can backfire. I made the pecan pie Friday night. We were going out, and the pie wasn't done so I set the oven timer for 15 minutes and went out the door..
When we got back at 9:30, a "very thoroughly cooked pie" was sitting on the stove. We investigated it later in the weekend and found it to be cement-like in texture, so I made another one and watched the oven myself.
Bob found the pie under seasoned. If you like a more spicy pumpkin pie, you could double the cinnamon, and add 1/4 teaspoon ground cloves. Unfortunately, it did not seem to be to every one's taste. We found a couple of half eaten pieces in the living room, as well as a plate containing all the mincemeat, carefully picked out. I ate it Friday night at leftovers fest. Seemed fine to me. Well, it might be an acquired taste.
Mincemeat-Pumpkin Pie
1 1/2 cups mincemeat
1 unbaked nine-inch pie shell, chilled
1 cup mashed cooked (canned) pumpkin
1/2 cup sugar
1/2 teaspoon cinnamon
2 eggs lightly beaten
1/4 teaspoon salt
1/4 teaspoon nutmeg
1/2 cup milk
1. Preheat the oven to 425 degrees.
2. Place the mincemeat in the bottom of the pie shell.
3. Using a rotary beater, combine the remaining ingredients. Pour over mincemeat. Bake thirty-five to forty minutes or until set. Serve slightly warm or at room temperature.
Makes six servings.
Tuesday, November 18, 2014
Really Fantastic Green Tomato Relish
While I was leafing through the cookbook looking for dessert recipes I came across a couple of recipes for green tomato pie. That didn't quite work because of the oven, but it gave me an idea. Look at the chutneys and relishes. There it was, Green Tomato Relish.
This is not any Green Tomato Relish. This relish made me want to rush out and buy hot dogs on Saturday night, just so I could eat the relish with the hot dogs. The fact that I had already had dinner was of no consequence. This relish is amazing as topping for cheese and crackers. This relish is so good, you want to eat it with a spoon. If you can still find green tomatoes in your local farmers market, you should make this relish right now.
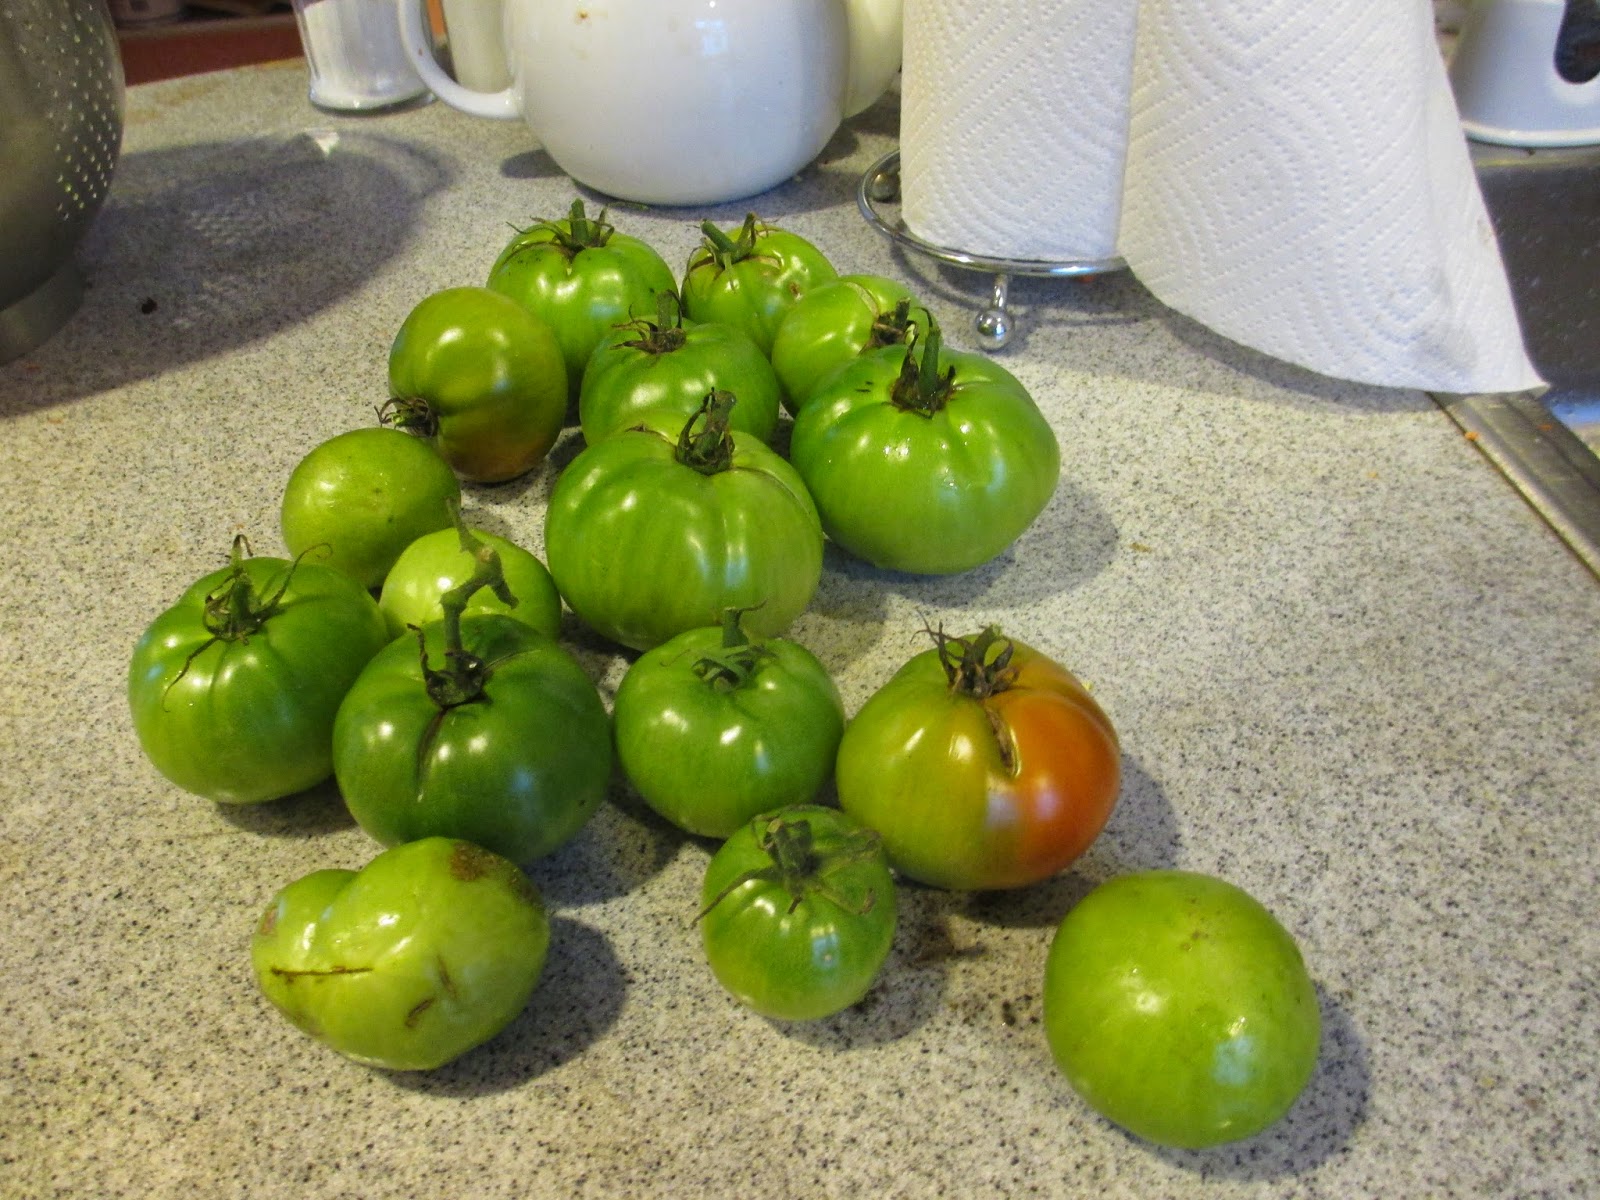
This is green tomato season. Farmers pick the tomatoes that are left on the vines, ripe or not. Some people ripen them on the window sill. I use them to can.
| The last tomatoes of 2014 |
On November 13, the first frost of the season was forecast. I went out to the garden to see what we had that might be harvested. We had an amazing crop of green tomatoes, which I picked, as well as quite a respectable number of hot peppers. That took care of the tomatoes. I walked up to Bethesda to the Women's Farm Market in search of the peppers and onions called for in the recipe.
The farmer had a basket of "smaller" peppers, half green, half red and large sweet onions. I was perplexed as to quantities. The recipe called for 15 green tomatoes, which I had, and 36 red and green peppers. Even the smaller peppers were pretty large by the standards of the 1960s , so I reasoned that 15 peppers would be enough to make the full amount of the recipe. This may have been somewhat faulty reasoning, but it seemed to work out in the end.
The friendly farmer sold me the peppers, onions and a pound of Brussels sprouts, and gave me a large paper shopping bag from Whole Foods to cart it home in. No sooner had I walked out of the market that I noticed that the handle was torn, and would certainly not last the two mile walk home. I loaded as many peppers into my too small carry bag as it would take, thus reducing the weight on the paper bag, and took the bus back to Friendship Heights. There I went to Giant to buy the rest of the ingredients, white vinegar and sugar, as well as a plastic bag to carry everything home in.
Once home, I started chopping. The tomatoes had to be chopped and then sprinkled with salt, after which they had to sit for an hour. Then came cutting up the peppers into "large cubes". This is a time consuming process that had to be interrupted when Bob and I went to church for the cabaret that a choir member stages every few months. The parish hall is transformed into a night club and singers in sparkly outfits sing torch songs.
I got back to the relish Saturday afternoon. This is a recipe that is greatly enhanced by a Cuisinart. The directions say, run the onions and vegetables through a food grinder. The Cuisinart, judiciously used, results in relish of a perfect consistency. Pulse, scrape and check. Don't just buzz, or you will have soup. Another item that speeds things up is the tea ball. The directions say to sew the spices into a cheesecloth bag. I dumped the cloves and celery seed into the tea ball, and put the two cinnamon sticks into the relish, to be fished out prior to canning.
This recipe results in a perfect sweet/sour balance of flavors, and slightly crunchy relish. Many times my canned goods end up gathering dust at the back of the closet in the kitchen, but this one will be used up, I know it.
Really Fantastic Green Tomato Relish
12 green tomatoes cored
1/3 cup coarse salt
24 green peppers
6 red sweet peppers
12 large sweet onions
1 gallon boiling water
4 cups white vinegar
3 cups sugar
1 tablespoon whole cloves
2 tablespoons stick cinnamon pieces
1 teaspoon celery seed
1. Chop the tomatoes and sprinkle with the salt. Let stand one hour. Drain.
2. Core and seed green and red peppers and trim away the white veins. Cut peppers into large cubes. Put peppers and the onions through a food chopper. (Cuisinart, please.) Add half the water and drain immediately in a colander.
3. Add the remaining water and let stand ten minutes. Drain.
4. Add the vinegar and sugar. Tie the cloves, stick cinnamon and celery seeds in a cheesecloth bag and add it. (Use a tea ball.) Bring the mixture to a boil and simmer, uncovered, exactly thirty minutes. Discard the spice bag.
5. Pour the relish into hot sterilized jars and seal in a boiling water bath for fifteen minutes, beginning the timing after the water is boiling. Remove from the boiling water allow to cool and store in a cool, dark, dry place. Makes about six quarts.
Labels:
green pepper,
green tomatoes,
onions,
red pepper,
relish,
spices,
Sugar,
vinegar
Sunday, November 16, 2014
Sweet Potato Pone (Gluten Free)
Our son and daughter-in-law came to dinner Thursday night. I decided to make lasagna because we had enough lasagna noodles to make at least two pans of lasagna. Also, they like lasagna. Dessert was a close call. I was going to make apple crumble, which I had made in the distant past and so would not result in a post. Then I started paging through the cookbook and discovered this. Easy, tasty, and as it happens, leaving a half sweet potato to make sweet potato quesadillas.
After walking to the grocery store, which I do nowadays in order to get in fitbit steps, I began boiling water for the lasagna noodles and grating sweet potato. It has to bake for three hours, so, I got it in at 4:30.
By 6:30, we needed the oven for the lasagna. Bob examined the pone, which was still in a largely liquid state, and suggested we leave it in as we turned the oven up to 350 degrees for the pasta. That was what we did. It turned out soft and sweet. It would have been better if I had started it later, because it is a dish best served warm.
This is a good fall dessert. It has all the fall flavors, molasses, cinnamon, nutmeg, ginger. Put it in the oven and forget about it. (Don't forget to set the timer, however!)
Sweet Potato Pone
2 cups grated raw sweet potatoes
1 egg beaten
1/2 cup unsulphered molasses
3 tablespoons sugar
3 tablespoons melted butter
grated rind of one orange
2 cups milk
1/2 teaspoon grated fresh or ground ginger
1/2 teaspoon cinnamon
1/2 teaspoon nutmeg
1/2 teaspoon salt
heavy cream or ice cream
1. Preheat the oven to 275 degrees.
2. Combine all the ingredients and pour into a one and one half quart baking dish. Bake three hours. Serve warm with heavy cream or ice cream. Makes six servings.
After walking to the grocery store, which I do nowadays in order to get in fitbit steps, I began boiling water for the lasagna noodles and grating sweet potato. It has to bake for three hours, so, I got it in at 4:30.
By 6:30, we needed the oven for the lasagna. Bob examined the pone, which was still in a largely liquid state, and suggested we leave it in as we turned the oven up to 350 degrees for the pasta. That was what we did. It turned out soft and sweet. It would have been better if I had started it later, because it is a dish best served warm.
This is a good fall dessert. It has all the fall flavors, molasses, cinnamon, nutmeg, ginger. Put it in the oven and forget about it. (Don't forget to set the timer, however!)
Sweet Potato Pone
2 cups grated raw sweet potatoes
1 egg beaten
1/2 cup unsulphered molasses
3 tablespoons sugar
3 tablespoons melted butter
grated rind of one orange
2 cups milk
1/2 teaspoon grated fresh or ground ginger
1/2 teaspoon cinnamon
1/2 teaspoon nutmeg
1/2 teaspoon salt
heavy cream or ice cream
1. Preheat the oven to 275 degrees.
2. Combine all the ingredients and pour into a one and one half quart baking dish. Bake three hours. Serve warm with heavy cream or ice cream. Makes six servings.
Labels:
baked Dessert,
butter,
egg,
milk,
molasses,
Sugar,
sweet potato
Wednesday, November 12, 2014
Okra Ham Soup
Okra Ham Soup is a summer recipe. I just squeaked under the line of what was possible with fresh produce. On Friday, my husband Bob and I went to the acupuncturist in Bethesda, and afterwards, took a turn through the Bethesda Women's Farm Market. This throwback to the 1940s is a small, shed-like building surrounded by Bethesda's nine or ten story office buildings. It contains relatively few actual farmers. I think there might be two or three. There is a woman who sells arsenal chocolate, a man who sells hand turned wooden bowls, a woman who sells Indian food, etc. You get the picture.
We stopped at the farmer, where I noticed okra. A week ago, I had bought a ham for this very recipe, which called for a ham bone. A person who shall remain nameless had gone all efficient and discarded the ham bone, but we won't talk about that. We still had the ham, and Mr. Farmer had the okra.
I bought the okra and Friday night, I went to work on the soup. It does not do to let okra lie around in your refrigerator. I have done this, and I can tell you what happens. It becomes slimy. I sliced the okra, used salt pork instead of bacon because we didn't have any bacon, and a can of petite diced tomatoes. Then I got to the lima beans. I thought maybe we had limas lurking in the bowels of the freezer, but no such luck. I finished off the soup sans limas , using frozen corn, but fresh thyme from the garden.
Saturday morning, I set off with my shopping bag and Watson the corgi to run down lima beans at the farmers' market on Connecticut Avenue. For this late in the year, the farmers, who were mainly Latino, had quite an array of produce, tomatoes, peppers, lettuce, kale, and a bunch of other stuff. as well as yummy looking and smelling El Salvadorian food, eggs and farm baked bread. One guy had beans in the shell that may have been limas. At least he said they were. They might have been broad beans. He said his beans were the last for the season, so I bought all of them.
I got them home and settled down to shell beans and listen to the famous National Public Radio news quiz program, Wait, Wait, Don't Tell Me. My calculations required a half cup of limas, but I ended up with less than a quarter of a cup. What the heck. They went in the soup.
The result was smoky and rich, excellent over rice, a great fall dinner. Southerners seem to like hot soup in hot weather, but I prefer it when the weather changes.
Okra Ham Soup
2 pounds okra, finely sliced. (frozen okra can be used)
1 tablespoon bacon drippings
1 tablespoon cider vinegar
1 ham bone (or a cup of diced ham)
6 tomatoes, peeled and chopped, or four cups canned
1 cup fresh butter or lima beans
1 small sprig thyme or one-half teaspoon dried thyme
salt and freshly ground black pepper to taste
water or chicken broth if necessary
1 1/2 corn kernels, cut from cob
3 cups hot cooked rice
1. Cook the okra quickly in a skillet with the bacon drippings and vinegar until okra loses its slimy consistency, stirring constantly.
2. Transfer to a kettle and add the ham bone, tomatoes, beans and thyme. Season with salt and pepper. Bring to a boil and simmer until meat on bone is very tender. Remove bone. Chop ham and return to kettle. Check consistency and, if too thick, add water or chicken broth.
3. Add corn kernels to soup. Cook three minutes. Serve over the rice.
Makes six servings.
We stopped at the farmer, where I noticed okra. A week ago, I had bought a ham for this very recipe, which called for a ham bone. A person who shall remain nameless had gone all efficient and discarded the ham bone, but we won't talk about that. We still had the ham, and Mr. Farmer had the okra.
I bought the okra and Friday night, I went to work on the soup. It does not do to let okra lie around in your refrigerator. I have done this, and I can tell you what happens. It becomes slimy. I sliced the okra, used salt pork instead of bacon because we didn't have any bacon, and a can of petite diced tomatoes. Then I got to the lima beans. I thought maybe we had limas lurking in the bowels of the freezer, but no such luck. I finished off the soup sans limas , using frozen corn, but fresh thyme from the garden.
Saturday morning, I set off with my shopping bag and Watson the corgi to run down lima beans at the farmers' market on Connecticut Avenue. For this late in the year, the farmers, who were mainly Latino, had quite an array of produce, tomatoes, peppers, lettuce, kale, and a bunch of other stuff. as well as yummy looking and smelling El Salvadorian food, eggs and farm baked bread. One guy had beans in the shell that may have been limas. At least he said they were. They might have been broad beans. He said his beans were the last for the season, so I bought all of them.
I got them home and settled down to shell beans and listen to the famous National Public Radio news quiz program, Wait, Wait, Don't Tell Me. My calculations required a half cup of limas, but I ended up with less than a quarter of a cup. What the heck. They went in the soup.
The result was smoky and rich, excellent over rice, a great fall dinner. Southerners seem to like hot soup in hot weather, but I prefer it when the weather changes.
Okra Ham Soup
2 pounds okra, finely sliced. (frozen okra can be used)
1 tablespoon bacon drippings
1 tablespoon cider vinegar
1 ham bone (or a cup of diced ham)
6 tomatoes, peeled and chopped, or four cups canned
1 cup fresh butter or lima beans
1 small sprig thyme or one-half teaspoon dried thyme
salt and freshly ground black pepper to taste
water or chicken broth if necessary
1 1/2 corn kernels, cut from cob
3 cups hot cooked rice
1. Cook the okra quickly in a skillet with the bacon drippings and vinegar until okra loses its slimy consistency, stirring constantly.
2. Transfer to a kettle and add the ham bone, tomatoes, beans and thyme. Season with salt and pepper. Bring to a boil and simmer until meat on bone is very tender. Remove bone. Chop ham and return to kettle. Check consistency and, if too thick, add water or chicken broth.
3. Add corn kernels to soup. Cook three minutes. Serve over the rice.
Makes six servings.
Wednesday, October 29, 2014
Baked Hominy and Tomatoes (Gluten Free)
This dish is actually made from hominy grits, not whole hominy as the title might lead one to expect. Hominy grits make a very tasty, versatile side dish. Dress them up with lots of cheese, and maybe canned tomatoes, and you can't go wrong. I decided to serve ham because the yms like ham, and because I needed a ham bone for a soup recipe. Hominy casseroles go well with ham, and everybody likes cheese.
The only potentially tricky element to this recipe is estimating the correct amount of uncooked grits you need to produce the three cups of cooked grits needed for the recipe. I listened to some helpful advice from a kitchen elf and made a monumental amount of grits, three times what was necessary. Grits are like rice. You use half of the uncooked produce to make the correct amount of cooked produce. To get three cups of cooked grits, cook one and a half cups of raw grits in three cups of water.
My husband Bob and I had been at church working on the rummage sale, so we did not prepare ahead of time. This is an easy recipe, but it does take time, about 20 minutes to cook the grits, and 45 minutes to bake the casserole. We ended up eating just as the World Series came on. Like I said, grits, cheese and tomatoes--you can't go wrong.
Baked Hominy and Tomatoes
3 cups canned or homecooked hominy grits
1 tablespoon butter
2 cups canned tomatoes or tomato puree
1/4 cup grated sharp Cheddar cheese
1/2 teaspoon salt
1/4 teaspoon freshly ground black pepper
1. Preheat the oven to 375 degrees.
2. Combine the hominy, butter, tomatoes, and cheese. Add the salt and pepper and pour into an oiled baking dish or casserole.
3. Bake about forty-five minutes.
Makes eight servings.
The only potentially tricky element to this recipe is estimating the correct amount of uncooked grits you need to produce the three cups of cooked grits needed for the recipe. I listened to some helpful advice from a kitchen elf and made a monumental amount of grits, three times what was necessary. Grits are like rice. You use half of the uncooked produce to make the correct amount of cooked produce. To get three cups of cooked grits, cook one and a half cups of raw grits in three cups of water.
My husband Bob and I had been at church working on the rummage sale, so we did not prepare ahead of time. This is an easy recipe, but it does take time, about 20 minutes to cook the grits, and 45 minutes to bake the casserole. We ended up eating just as the World Series came on. Like I said, grits, cheese and tomatoes--you can't go wrong.
Baked Hominy and Tomatoes
3 cups canned or homecooked hominy grits
1 tablespoon butter
2 cups canned tomatoes or tomato puree
1/4 cup grated sharp Cheddar cheese
1/2 teaspoon salt
1/4 teaspoon freshly ground black pepper
1. Preheat the oven to 375 degrees.
2. Combine the hominy, butter, tomatoes, and cheese. Add the salt and pepper and pour into an oiled baking dish or casserole.
3. Bake about forty-five minutes.
Makes eight servings.
Labels:
cheese,
Gluten Free,
hominy grits,
side dish,
tomatoes
Fried Oysters (Gluten Free)
Last Sunday, I returned from an almost three month long sojourn in the United Kingdom where I either dined on reheatable Indian food from Tesco or vegetarian dishes from my daughter's student vegetarian cookbook. Having a desire to see the rest of the family we invited son and daughter in law (and grandbaby to be) over for dinner. After a couple of at cross purposes text messages, we ascertained that, yes, daughter-in-law did like fried oysters so they went on the menu.
The South section has about a million oyster recipes, so I figured I had better strike where the striking was good. This meant that Bob, my shellfish adverse husband, would have to eat something else as an appetizer. He is not generally crazy about this, but went along.
I bought a jar of oysters from the Fishery, our local fish store. If you have ever tried to open oysters, you will know that this was a wise move. For years, I had a scar on my left hand from where the knife I was holding slipped off the oyster into the bottom of my index finger.
Step one says to dry the oysters on paper towels. Our paper towel supply was depleted, so I just did the best with the few squares we had that I could. If you want to make fried oysters, I suggest you lay in a supply of paper towels for the evening. It also pays to read the recipe all the way through because I did not notice until this moment that the oysters were supposed to be dipped in beaten egg and cornmeal twice and then let stand for twenty minutes. I dipped once and fried immediately.
It would take a more discerning palate than mine to tell the difference. However, Julia Child says follow the recipe, so don't cut corners the way I did.
Fried Oysters
12 large plump oysters ( ours came in a jar.)
1 egg
2 tablespoons water
yellow corn meal
salt and freshly ground black pepper to taste
fat for deep frying
lemon wedges
1. Drain the oysters and dry on paper towels.
2. Beat the egg with water. Dip the oysters one at a time in the egg, then in corm meal seasoned with salt and pepper. Dip them in egg again, then again in corn meal. Let stand thirty minutes.
3. Preheat the fat to 375 degrees. Fry the oysters until until corn meal is golden brown. Drain on paper towels. Serve with lemon wedges.
Makes two to four servings.
The South section has about a million oyster recipes, so I figured I had better strike where the striking was good. This meant that Bob, my shellfish adverse husband, would have to eat something else as an appetizer. He is not generally crazy about this, but went along.
I bought a jar of oysters from the Fishery, our local fish store. If you have ever tried to open oysters, you will know that this was a wise move. For years, I had a scar on my left hand from where the knife I was holding slipped off the oyster into the bottom of my index finger.
Step one says to dry the oysters on paper towels. Our paper towel supply was depleted, so I just did the best with the few squares we had that I could. If you want to make fried oysters, I suggest you lay in a supply of paper towels for the evening. It also pays to read the recipe all the way through because I did not notice until this moment that the oysters were supposed to be dipped in beaten egg and cornmeal twice and then let stand for twenty minutes. I dipped once and fried immediately.
It would take a more discerning palate than mine to tell the difference. However, Julia Child says follow the recipe, so don't cut corners the way I did.
Fried Oysters
12 large plump oysters ( ours came in a jar.)
1 egg
2 tablespoons water
yellow corn meal
salt and freshly ground black pepper to taste
fat for deep frying
lemon wedges
1. Drain the oysters and dry on paper towels.
2. Beat the egg with water. Dip the oysters one at a time in the egg, then in corm meal seasoned with salt and pepper. Dip them in egg again, then again in corn meal. Let stand thirty minutes.
3. Preheat the fat to 375 degrees. Fry the oysters until until corn meal is golden brown. Drain on paper towels. Serve with lemon wedges.
Makes two to four servings.
Labels:
Appetizer,
deep fried,
Gluten Free,
oysters,
shellfish
Subscribe to:
Posts (Atom)